
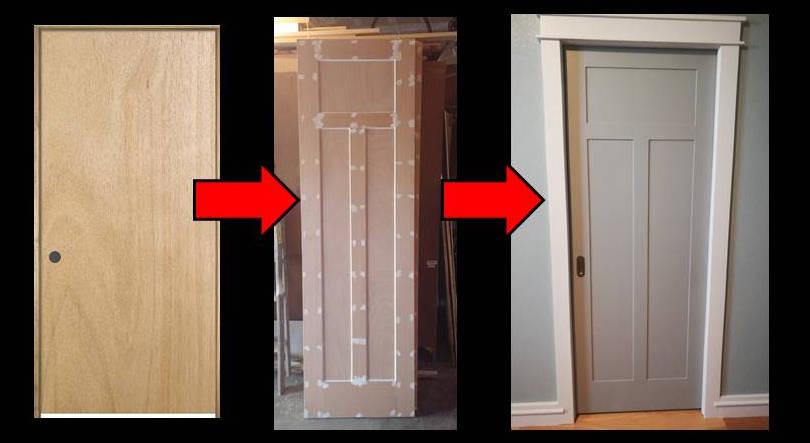
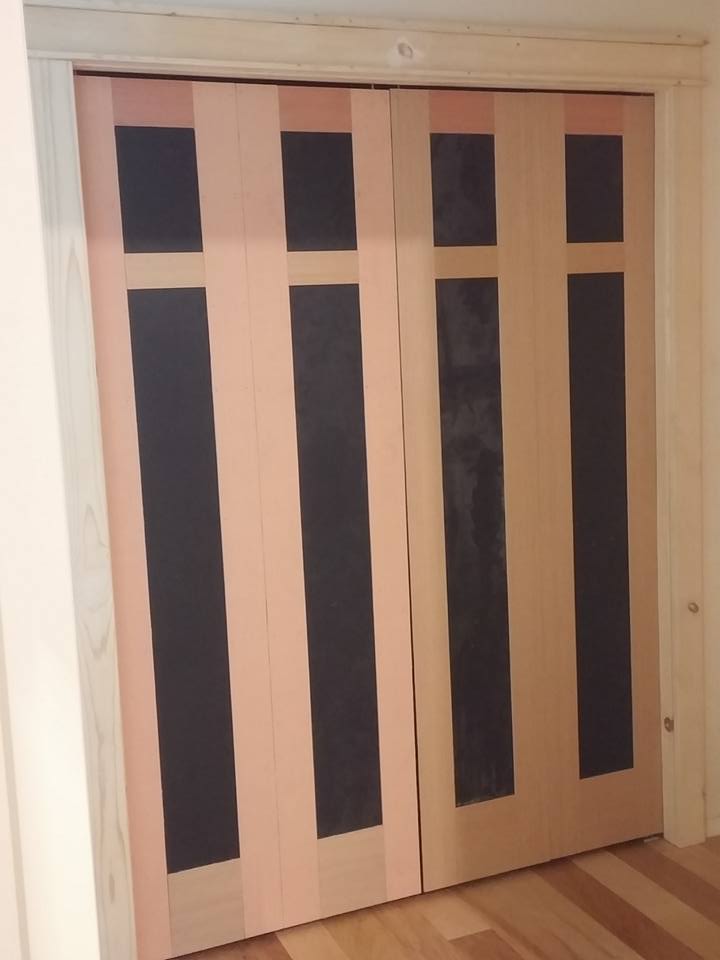
Who doesn’t hate those cheap looking flat doors? In my last post about Installing Pocket Doors, you may have seen a glimpse of our new shaker style doors. I transformed some cheap flat panel doors into shaker style paneled doors with just some plywood strips and paint…
Materials
- 1/4″ Plywood ($14 for one sheet that will do about 3 door sides or 1 1/2 doors)
- Caulk (latex, paintable type)
- Wood Filler (I use DURHAM’S Rock Hard Water Putty)
- Construction adhesive and/or 1/2″ crown staples (for pneumatic stapler)
- Primer (INSL-X Stix Primer is amazing)
- Paint (Benjamin Moore Advance is my recommendation for high quality paint)
Total Cost ~$20 per door.
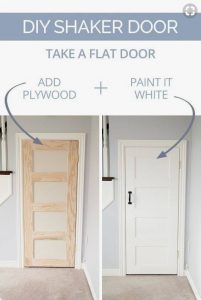
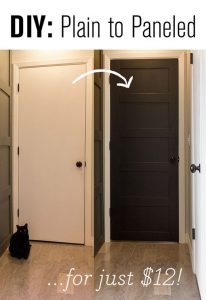
Pinterest Inspiration
Yes, I use Pinterest! It’s not just for the girls. 😉 I actually combined a few ideas that I found on Pinterest to create these doors…
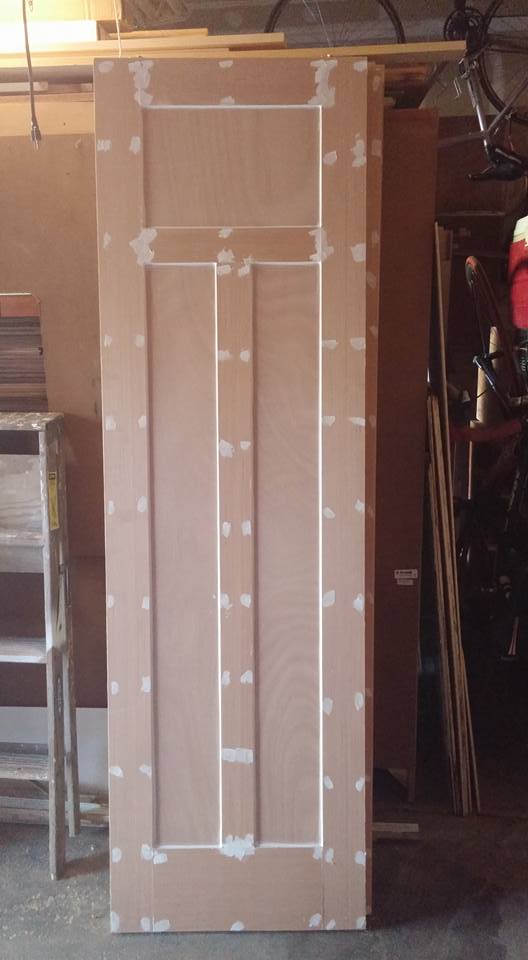
Dimensions
I ripped the plywood on my table saw to (3) dimensions: 4″ wide, 3″ wide, and 8″ wide. Each side of a door requires (2) 4″ strips for the stiles, (1) 4″ top rail, (1) 3″ strip for the middle rail and stile, and (1) 8″ rail for the bottom. The width will vary depending on your door size. A picture is worth 1000 words here…

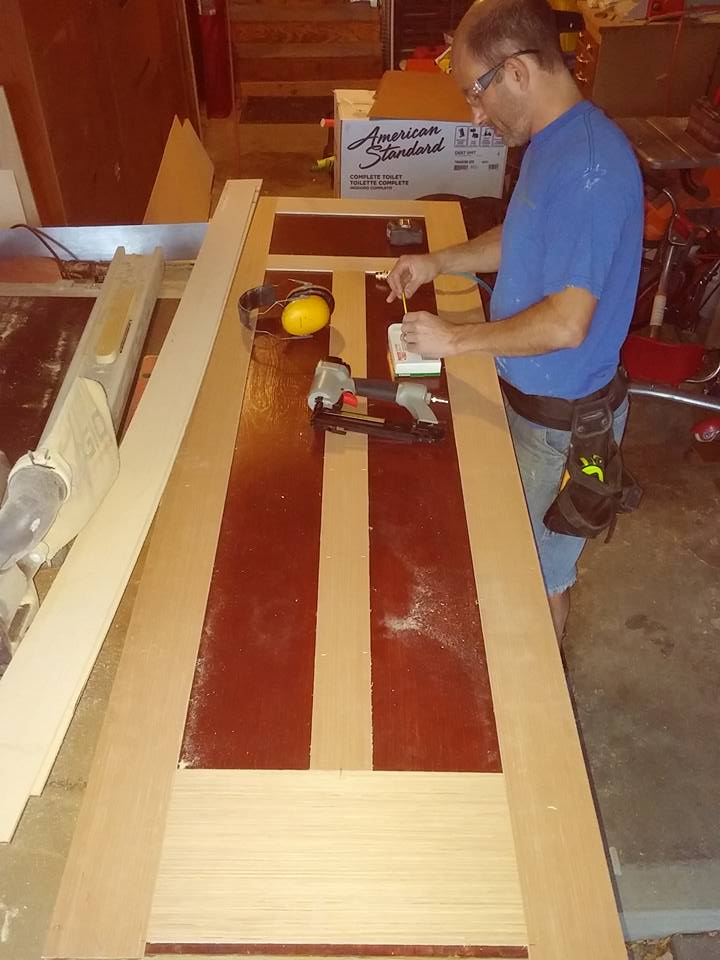
Plywood Installation
I used my pneumatic crown stapler to attach the plywood to the doors, but you can also use wood glue or construction adhesive.

Wood Filler and Caulk
Wood filler and caulk are the key part of this project. Everything looks a little rough around the edges unless you do a quality job of caulking all the seams and filling all the staple holes. I caulked around the inside of all the “panels” to seal them to the door. One quick round of sanding with 220 grit sand paper after that, and you are ready for paint.
Holes for the Handles
I used my router with a bearing guided bit to re-cut the holes for the handles. This way, you can just drill a hole somewhere in the middle of the door handle, plunge the router through the hole, and follow the edge of the existing hole with the bearing.
If you don’t own a router, another easy way would be to finish one side of the door at a time. Then, use a drill with the correct size hole saw to re-cut the hole from the back side.
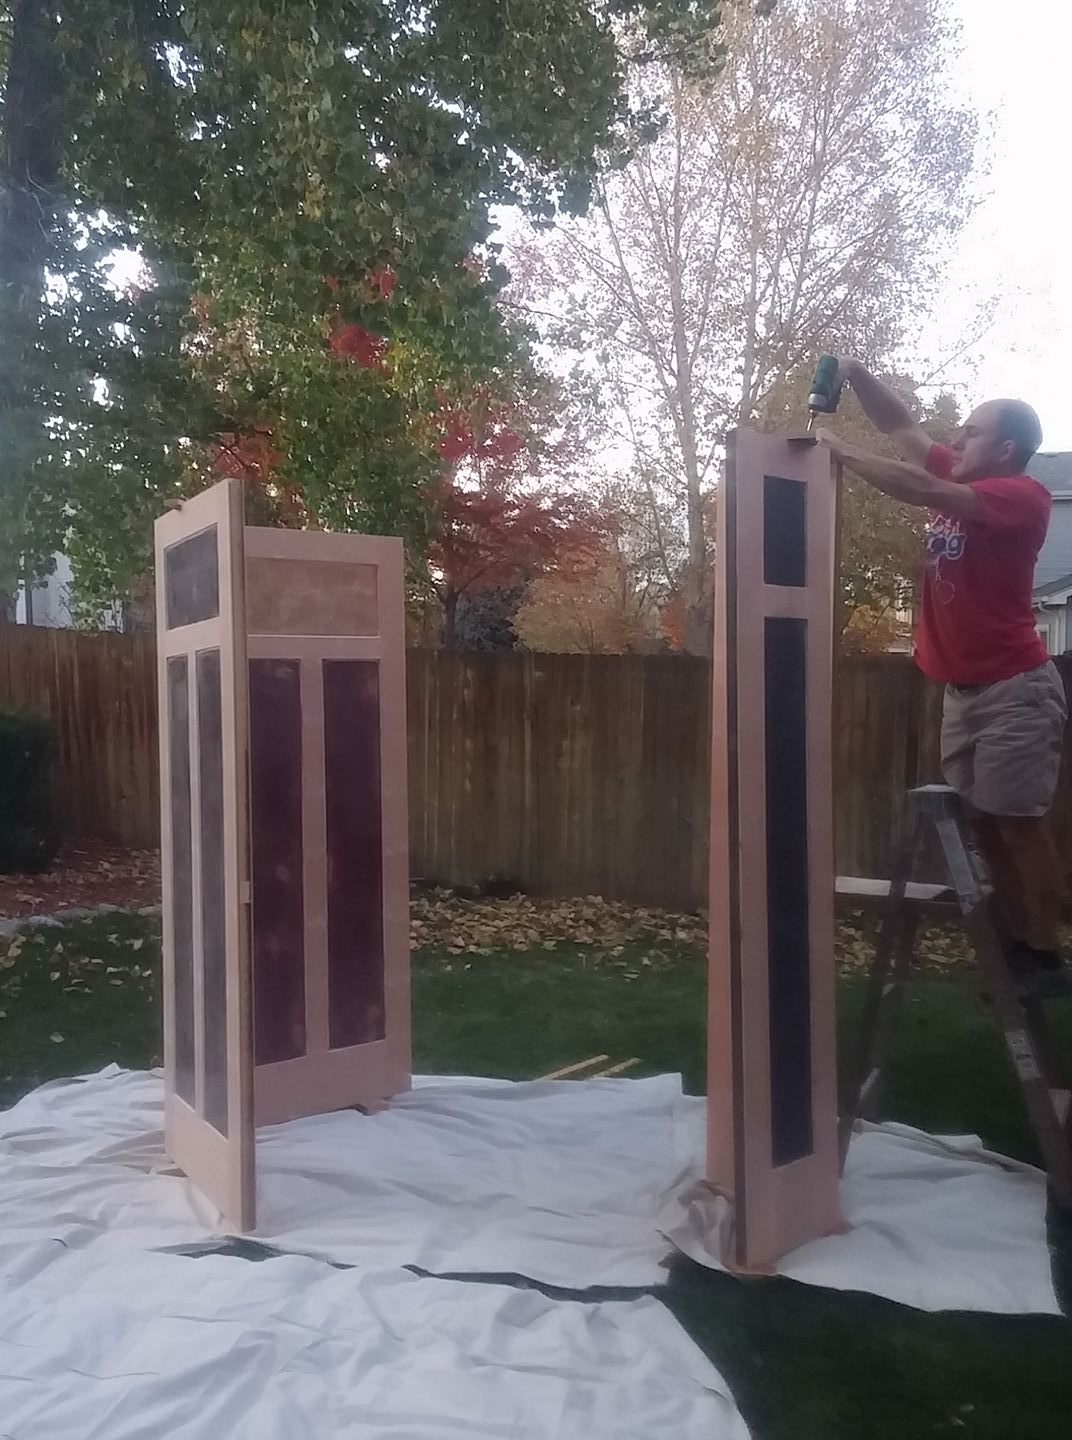
Primer and Paint
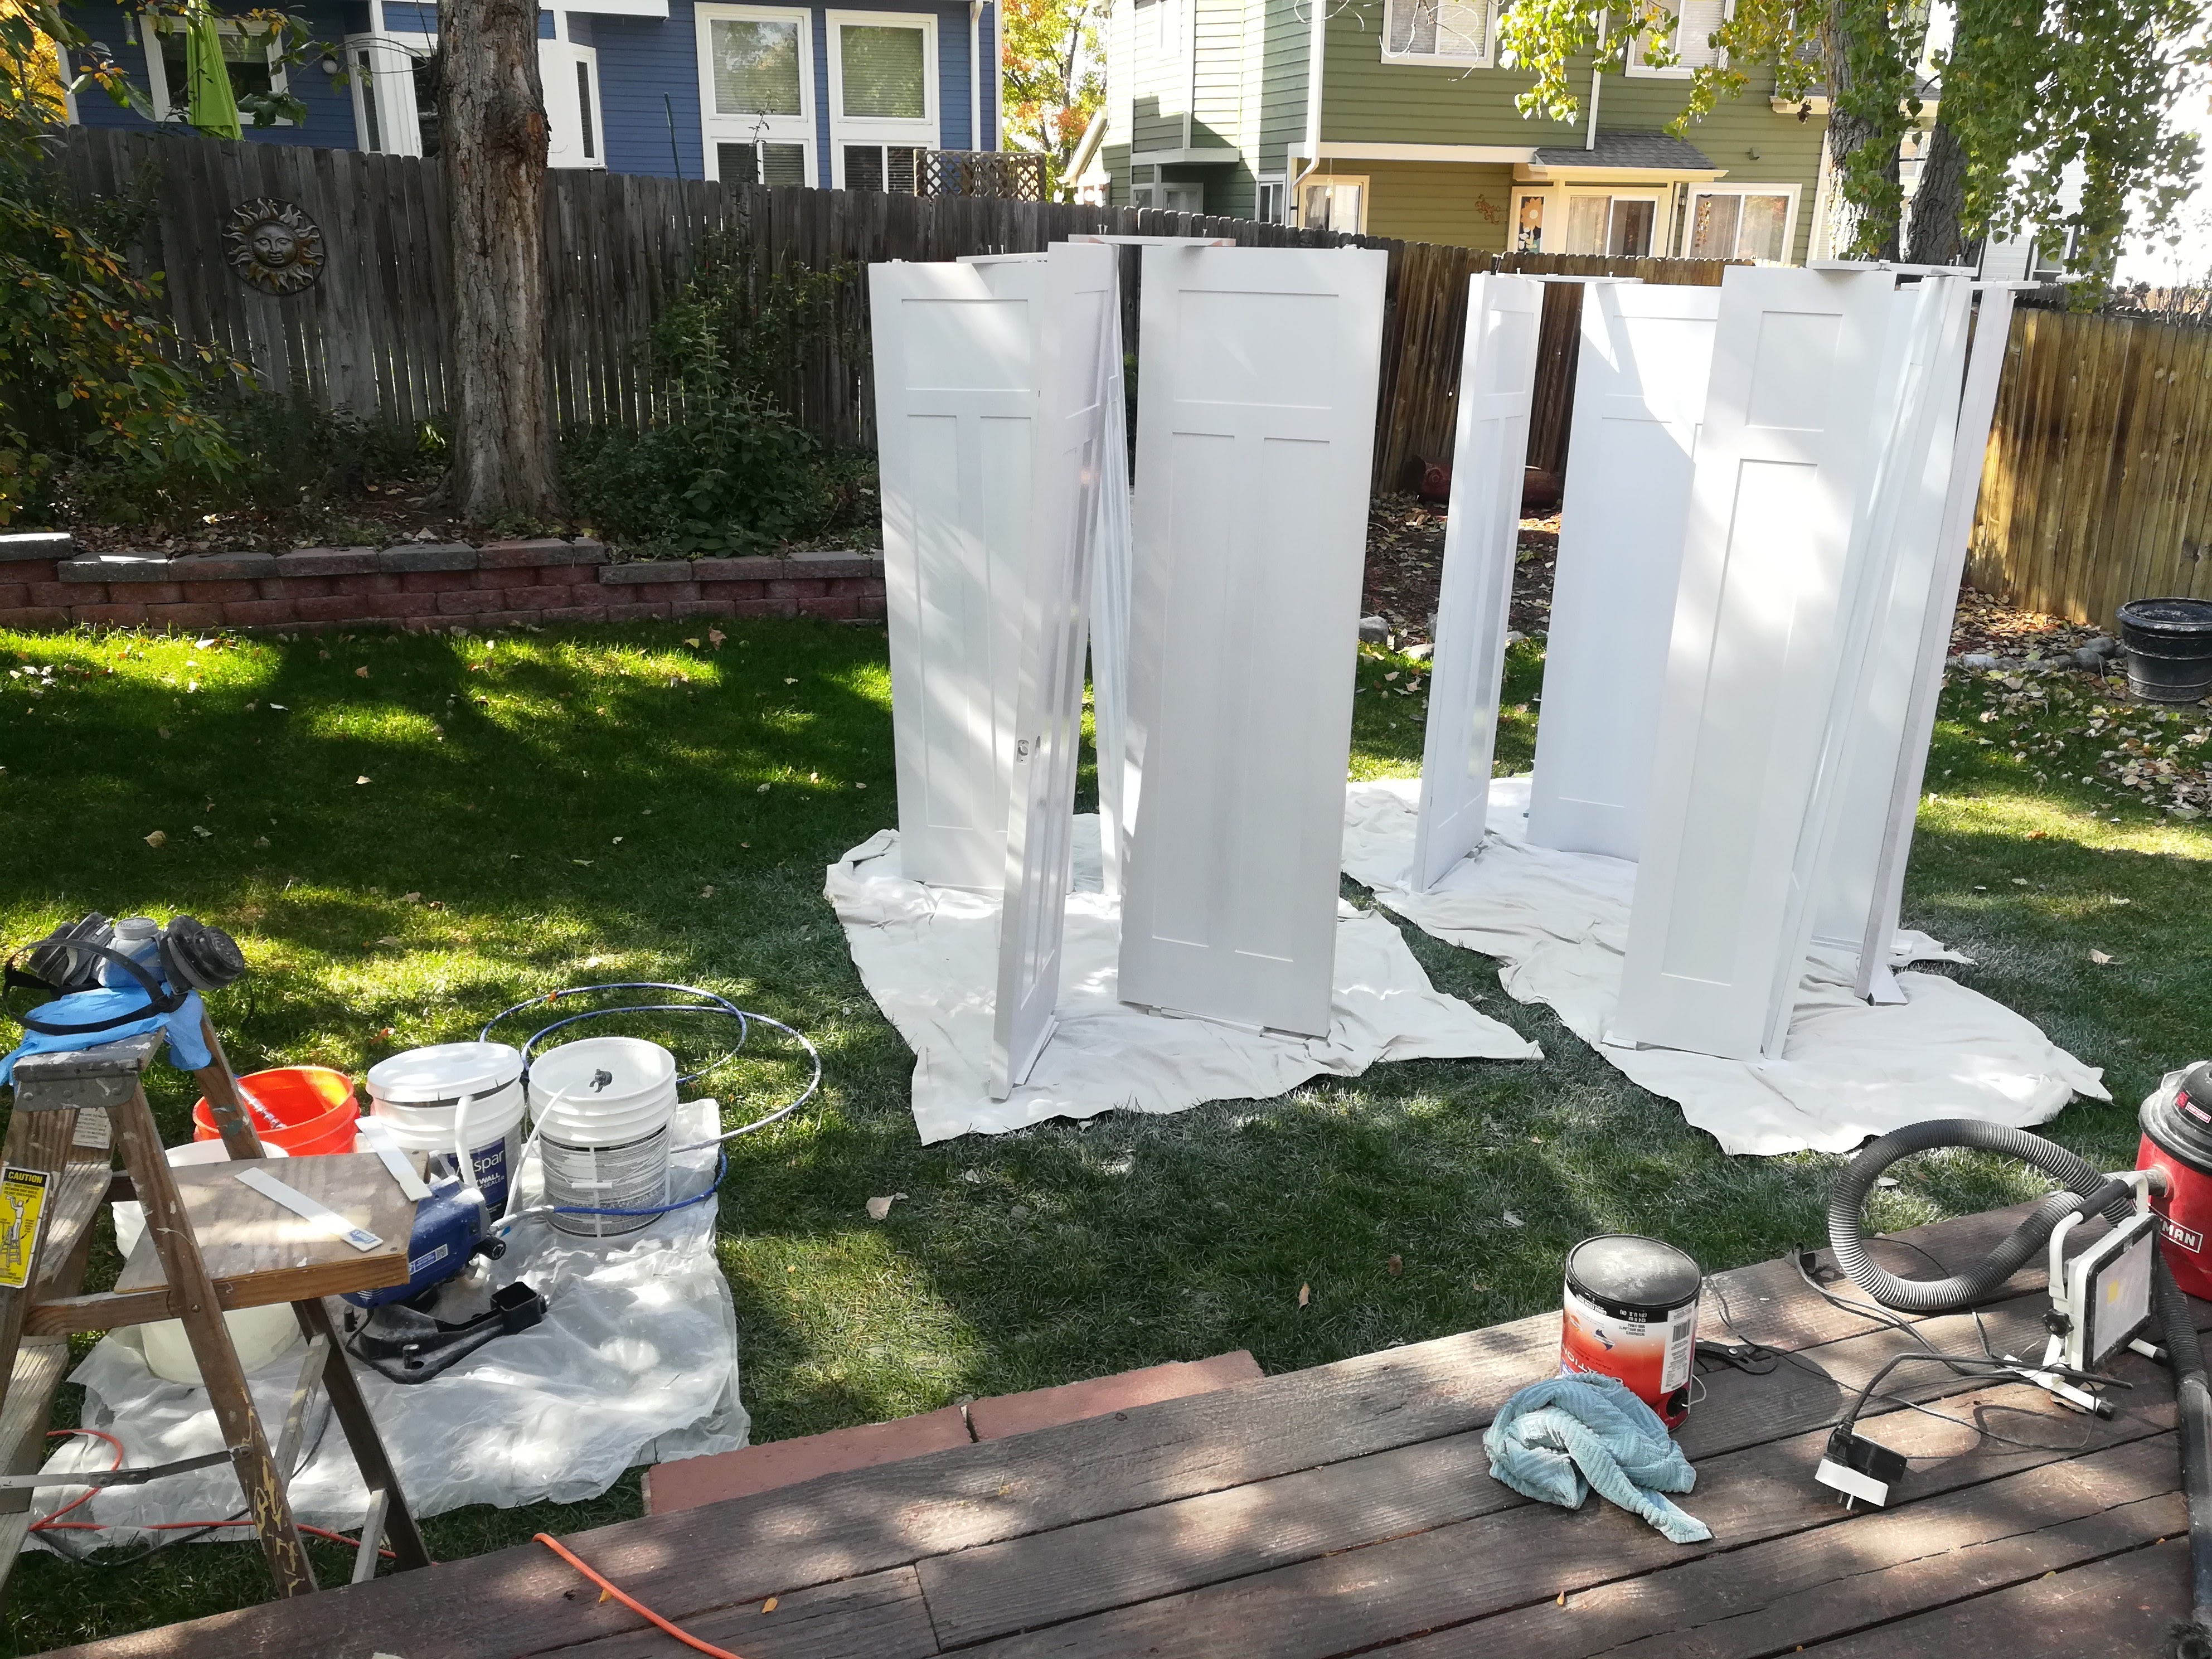
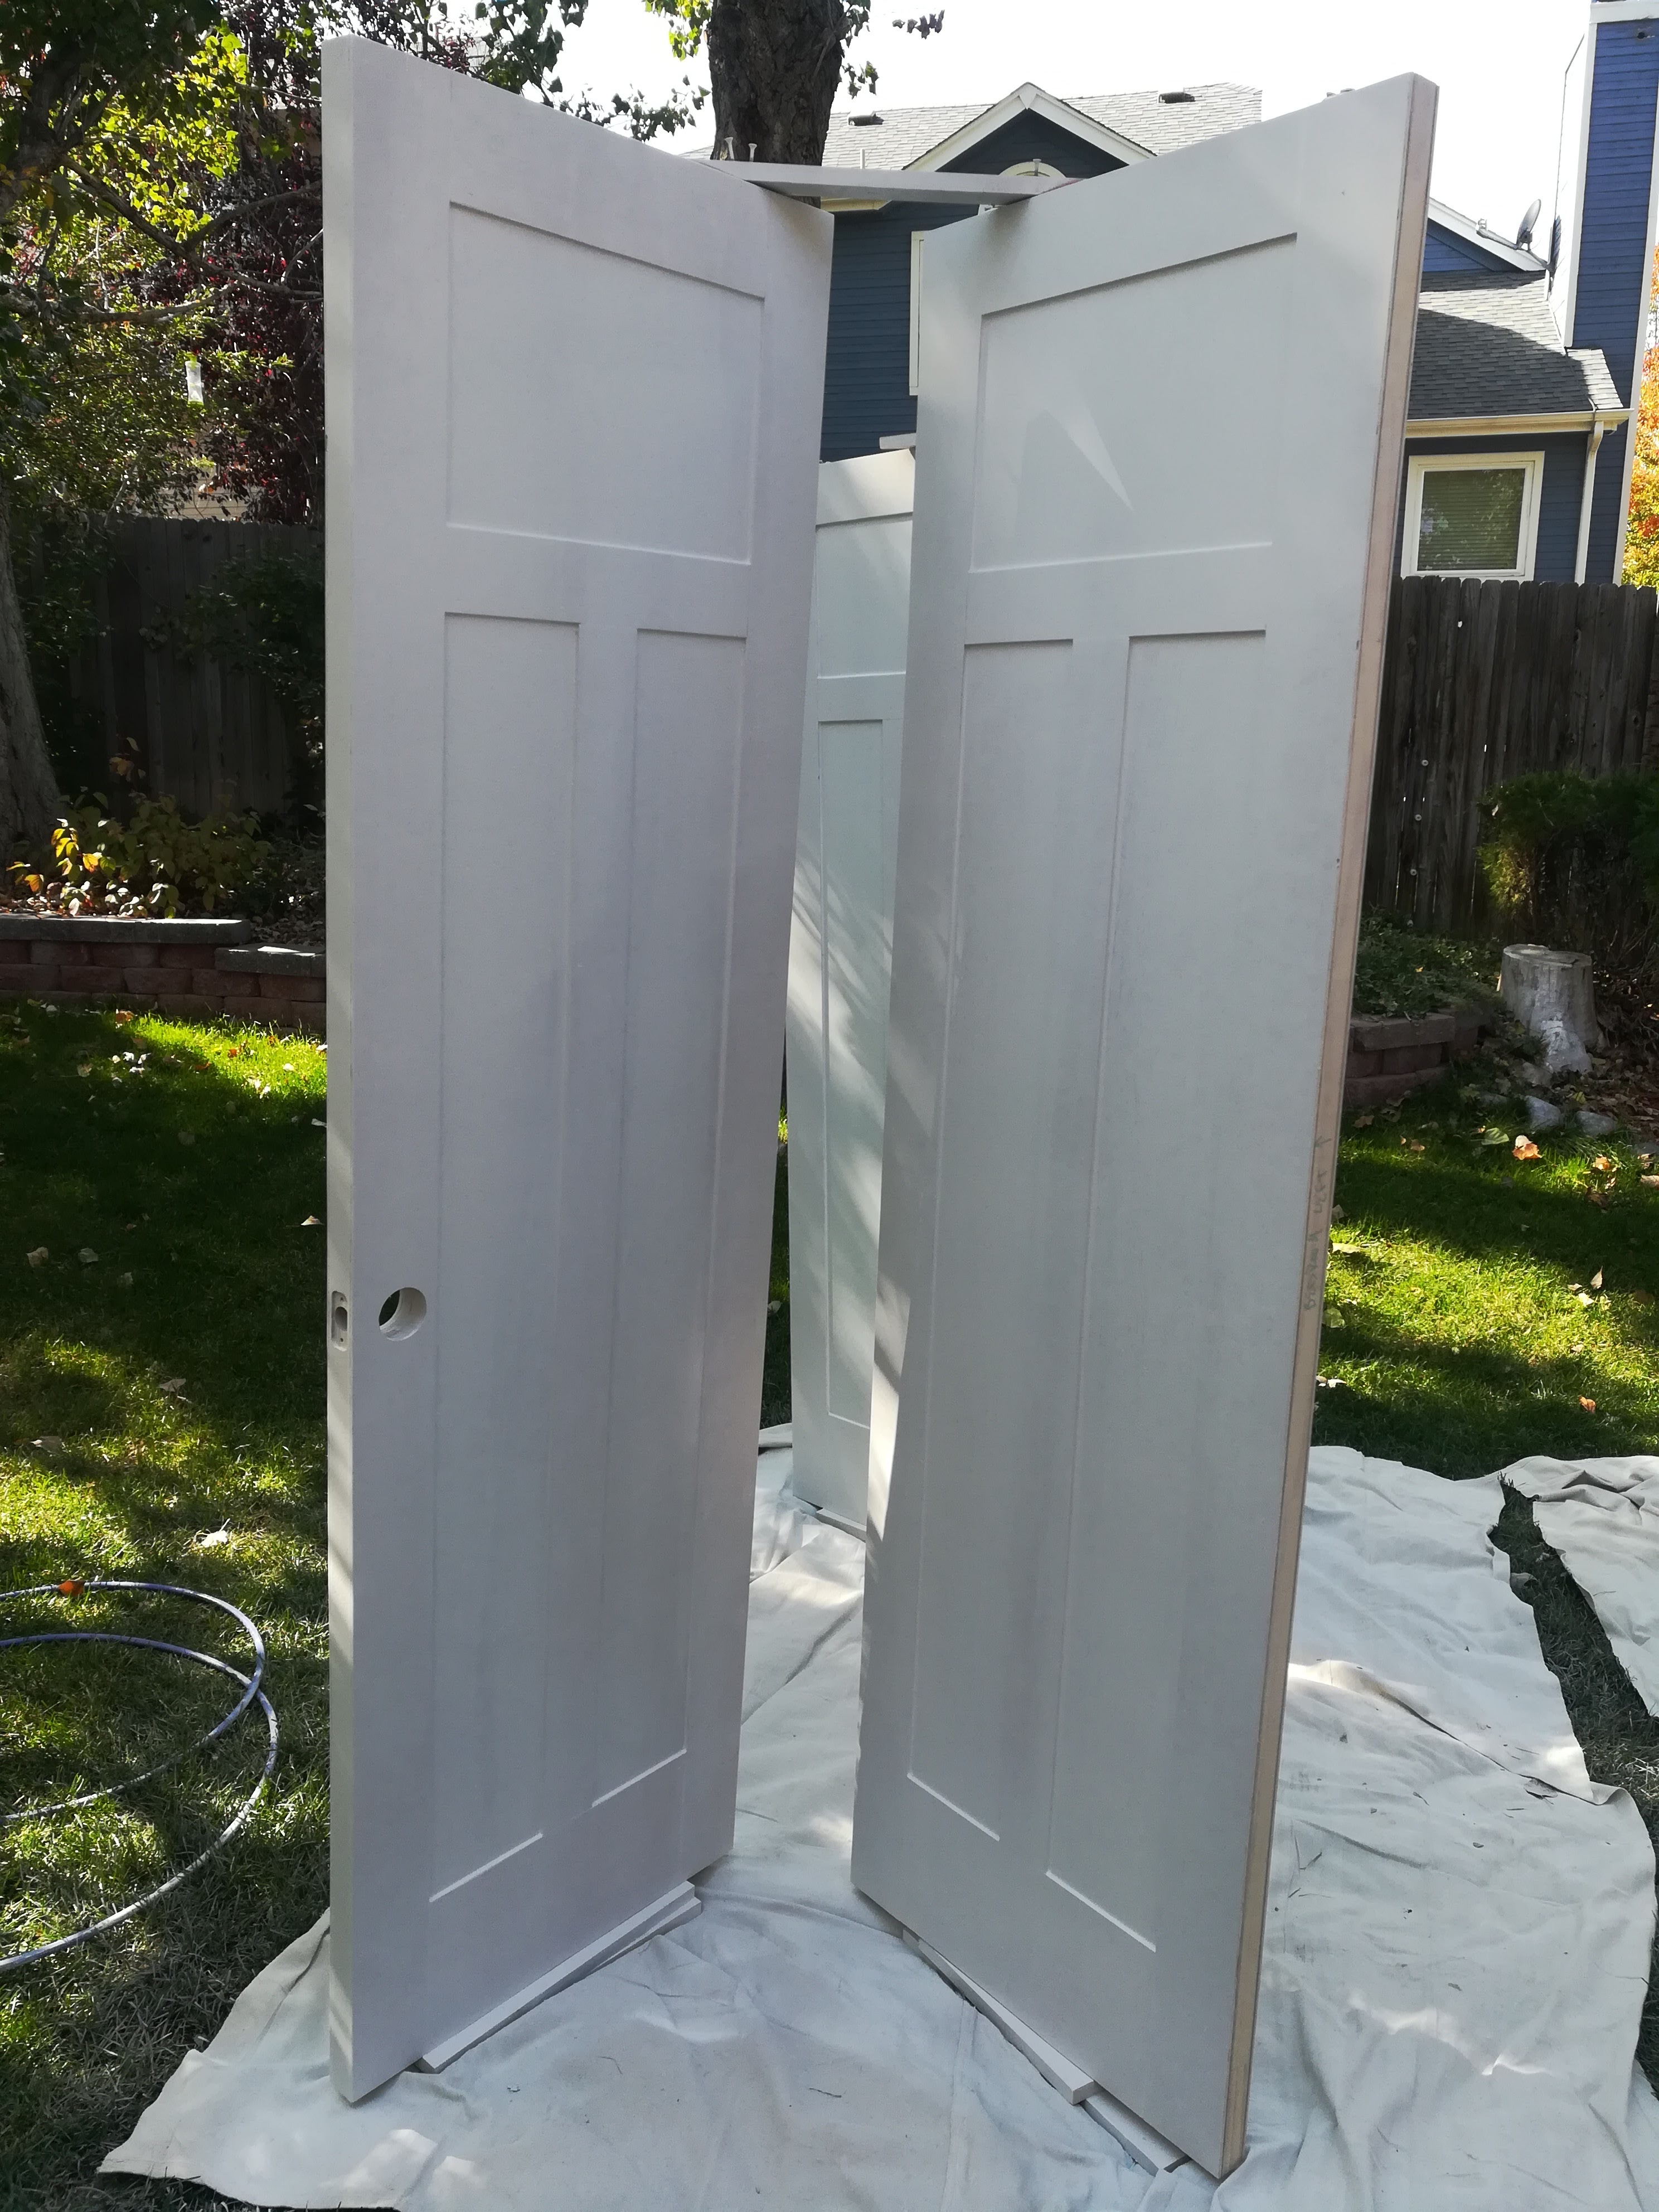
I used my airless Graco Magnum Project Painter to paint the doors, but there are many other ways to get it done. I like the airless sprayer because it is super fast and the result is a very smooth finish. I used a piece of scrap wood to attach two doors together at the top and some scrap 2×4’s underneath to space them off of the ground.
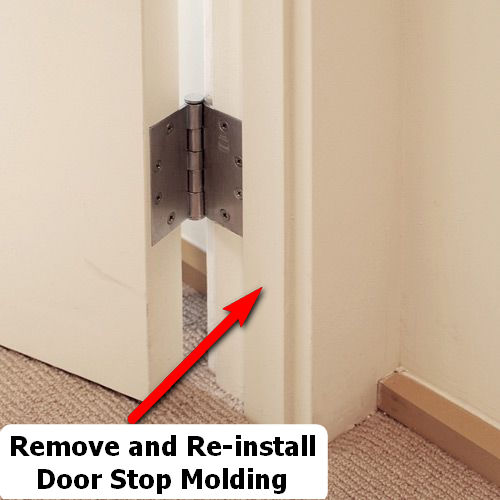
Install the Door
After the paint is dry, it is time to install the hinges and handles and hang the door back up. You will need to remove and re-install the door stop on the door frame to accommodate the new thicker door also… which will probably lead to more sanding and painting. All good things take time, I guess!
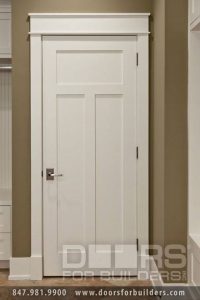
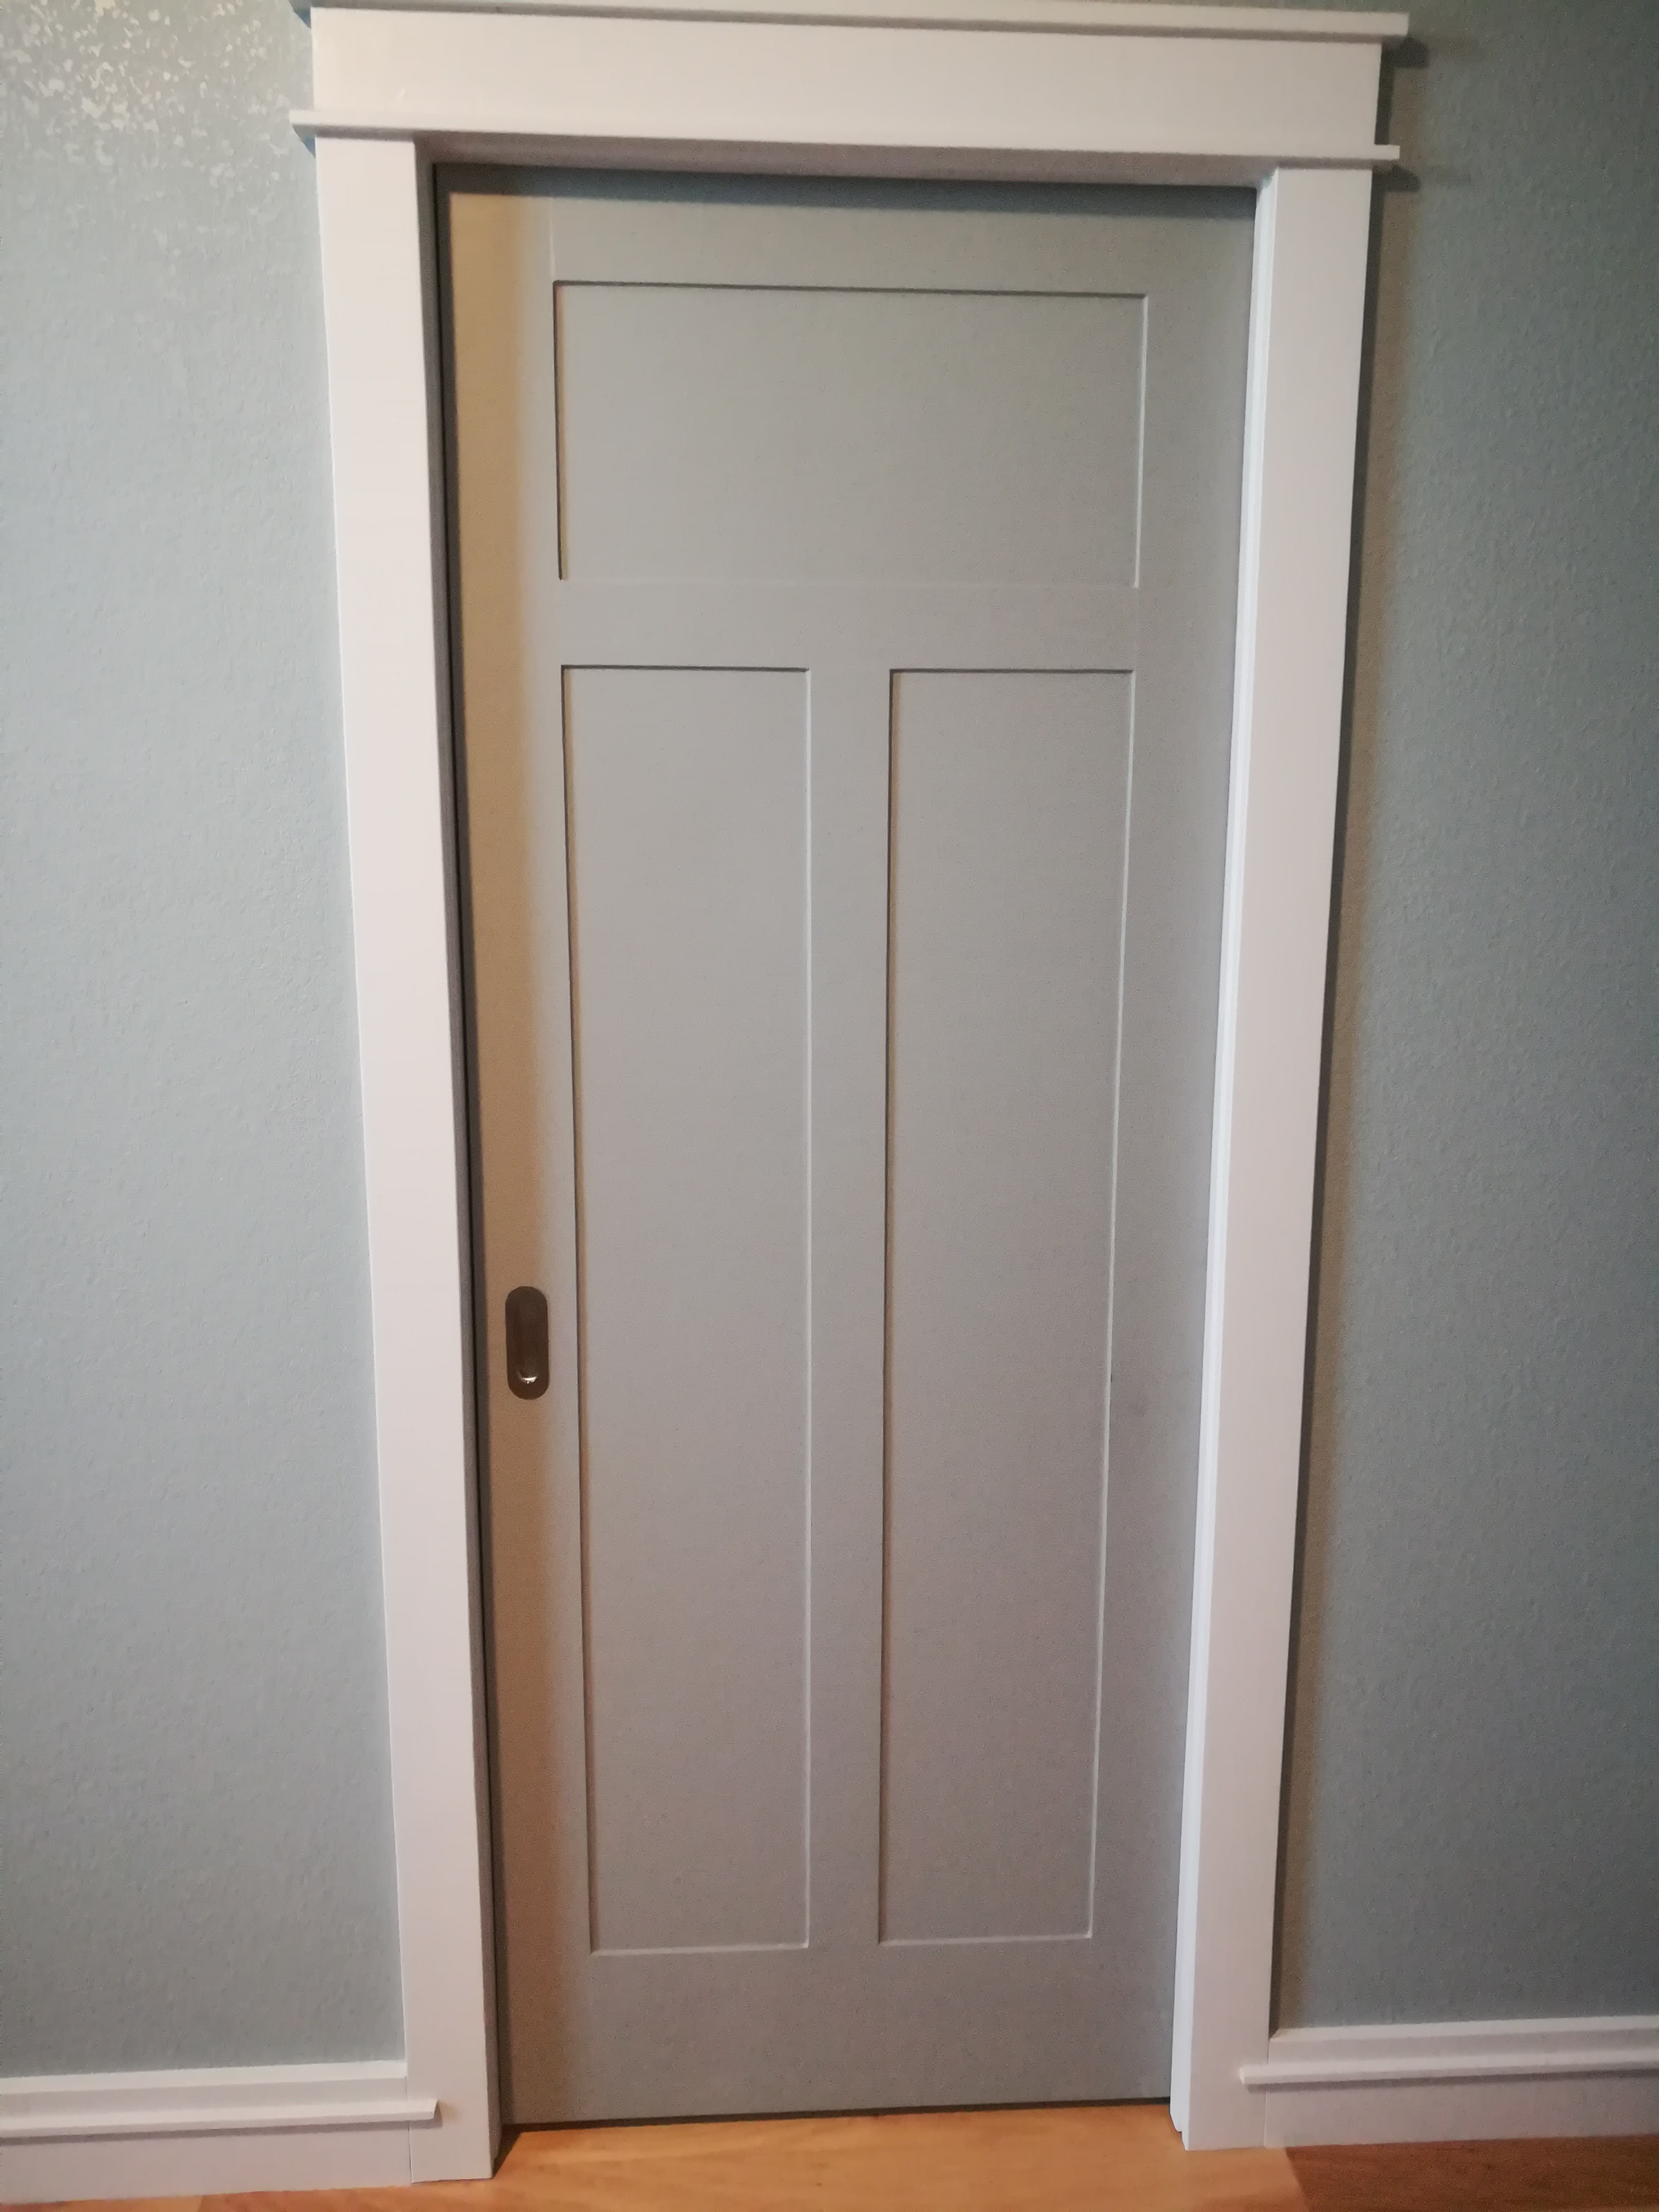
 The finished product is a total game changer for the look of a room. I’ve re-finished 14 doors so far in our house and the difference is amazing. There are still 5 more to do downstairs too… 19 doors… wow! I never counted them up until I wrote this. There is no way I could have afforded to replace all of those doors!
Leslie was skeptical at first about my choice of gray for the doors, but she is totally sold now. What’s not to like?
Till next time…
Wow we are on a budget and doing interior on our new build prices of doors are ridiculous will have to try this, those doors look amazing
Doesn’t the 1/4″ plywood strips on both sides of the door add 1/2″ thickness to the pocket door? Did the extra thickness (and extra weight on the hardware) affect how the door functions?
It does, but the additional weight is not significant. This hardware is designed to hold a solid wood door, which is much heavier. The extra thickness is not a problem at all. The split jamb trim just ends up being a little narrower.
You mentioned “The split jamb trim just ends up being a little narrower.” Did you cut it or take it off and move it over?
In this case, it was new trim. Generally though I would take it off and move it. It’s easier and the finished result looks better.
[…] out this article on how I made these doors from basic cheap flat-panel […]