
Do you cringe at the thought of your toes touching the cold tile floor when you get out of your comfy warm shower? I used to too, but then I read about heated floors! When it was time to remodel the first bathroom in my previous house (in 2004), that idea was at the top of the list. Heated tile flooring is on my project list again at the new house! I thought that I would write this post to talk about a few things on the subject:
- How to heat your floor… The options
- Where can it be installed
- Why I chose loose cable electric heating
- How I installed it
- What I’m doing different this time
How to heat your floor… The options
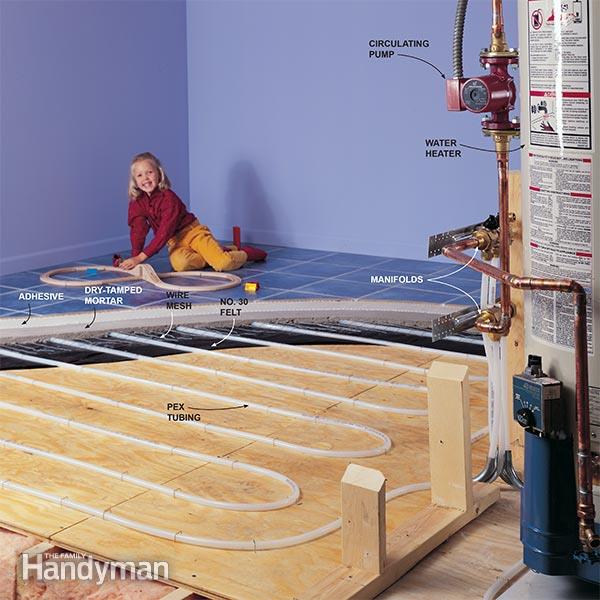
The two basic floor heating options are electric or hydronic (hot water). Unless your house is already using radiators and has a hot water heating system installed, you will definitely want to stick with the electric floor heating for a small area like a bathroom. It is just too expensive to install all the basic heating and pumping equipment for a hydronic system this size.
| Hydronic Floor Heating | Electric Floor Heating |
 |
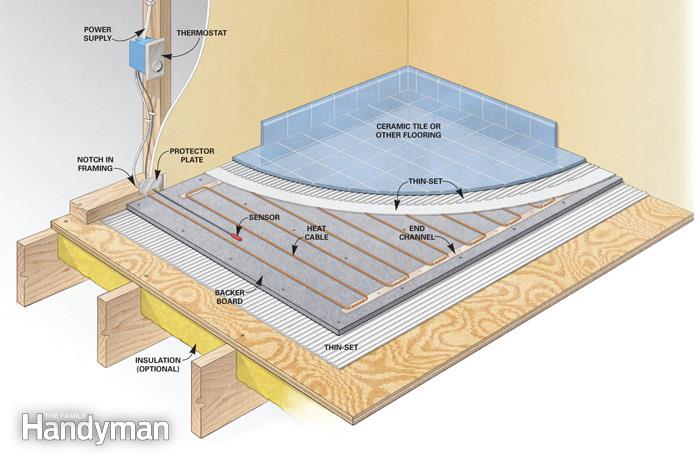 |
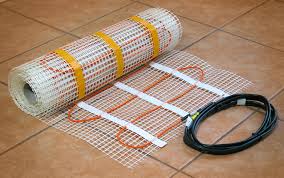
Electric floor heating is actually a pretty simple system. Heating cable below the floor is powered to heat up the flooring from below the surface. The heating cable is controlled by a thermostat that is very similar to your standard house thermostat. The only difference here is that there is a sensor in the floor to monitor the temperature. The thermostat just turns the power on and off to the heating cable based on that temperature. The thermostat that I used even had typical 5/2 day controls to change the temperature setting based on the time of day. A lot of manufacturers also make “mat” versions of the heating cable. This is just to simplify the installation. You can roll out a mat that already has the cable embedded in it and spaced out properly.
| Electric Heating “Mat” | Electric Heating Cable |
 |
 |
Where can it be installed?
The quick answer is “just about anywhere”. As long as the surface above can withstand the temperature of the heating cable, then it should work. Depending on the flooring surface though, the heating effectiveness can vary quite a bit. You also need to be careful with how the flooring surface is attached. You don’t want to nail through the heating cable or have the glue that holds your laminate flooring melt. You can install electric heating…
- Under your tile
- Under your hardwood flooring
- Under laminate flooring
- Under carpet
- In your sidewalks – to melt the snow
- … and many more.
Why I chose loose cable electric heating
The small size of this bathroom was the driving factor in choosing a basic electric cable installation. The house has forced air heating, so hydronic heating was definitely not an option. I figured that I would spend more time cutting up the heating mats to go around all the little areas than it would be worth.
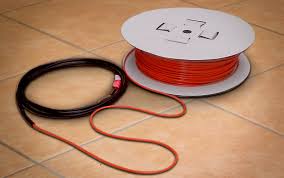
That left me with a basic spool of heating cable. It just made sense. I could work it easily around the vanity, tub, toilet, and linen cabinet. It’s also quite a bit cheaper than the mat option. Anybody that knows me would know that I’m always trying to save a few bucks where I can. 😉
How I installed it
The most challenging part of this project was just coming up with “The Plan”. It took a bit of research, but I learned all the basic details with some Googling, as usual:
- I needed a separate 15 amp circuit for the floor heating. No big deal – just another romex from my breaker box.
- The circuit needs a GFCI (Ground Fault Circuit Interrupter). That makes sense in the bathroom anyway – nobody likes getting shocked.
- I needed a convenient place to mount the thermostat that was still close enough for the end of the heating cable and the temperature sensor to reach. I decided on a wall location near the toilet.
- Cable spacing needs to be 3″ apart for general floor heating.
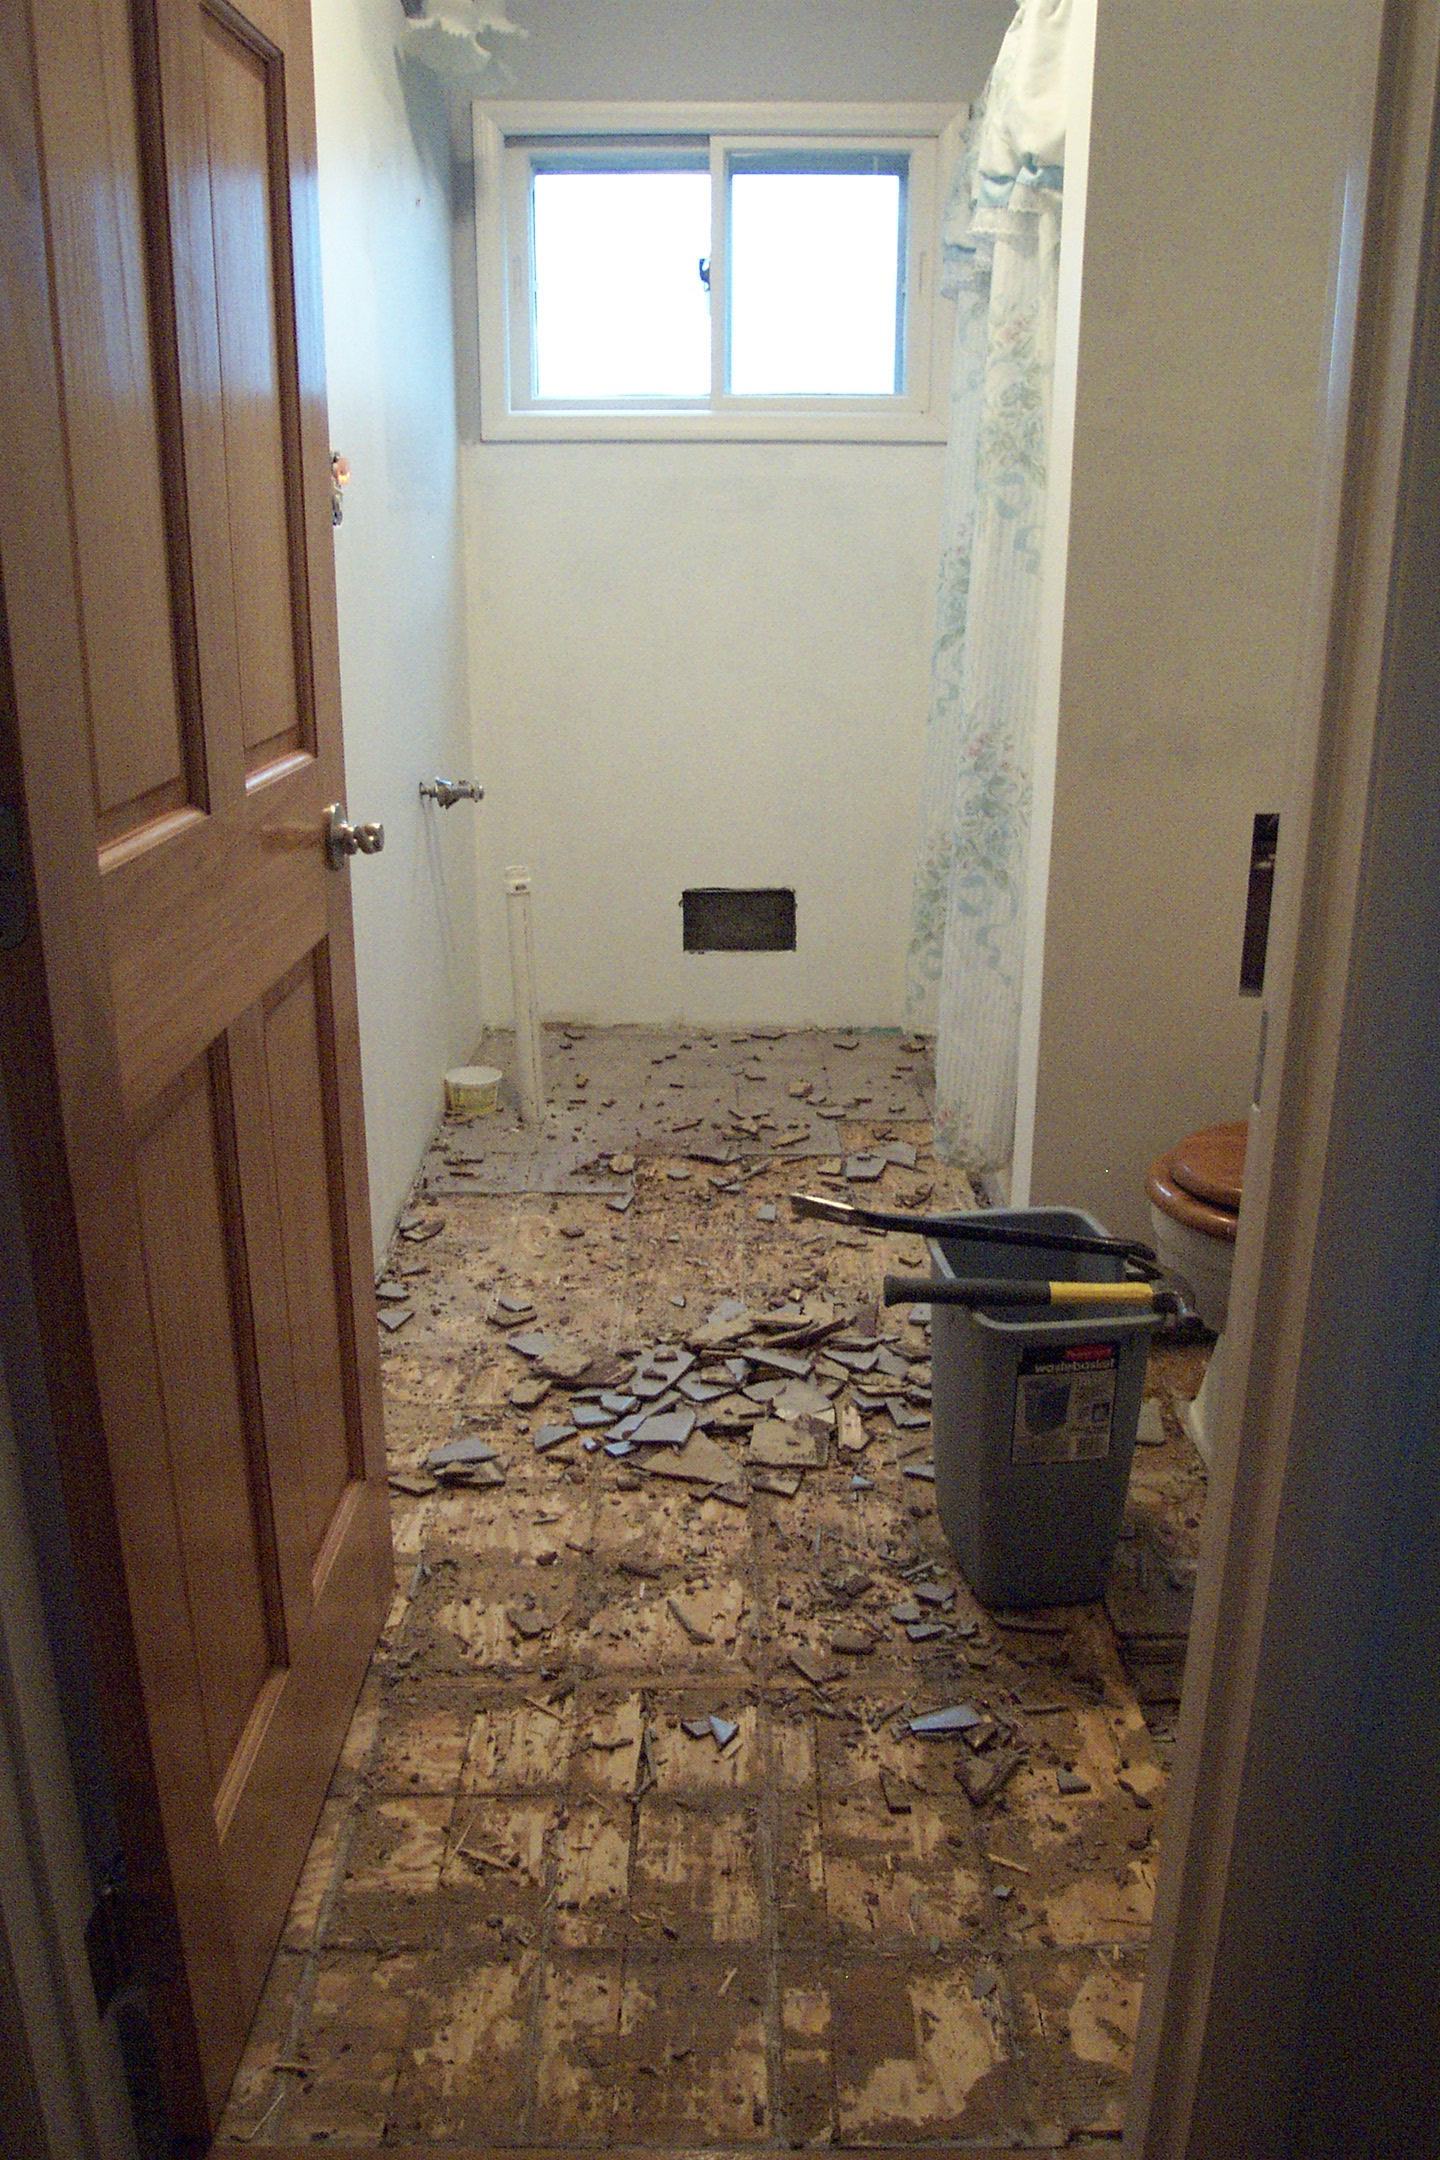
Step 1: Demo the existing ugly flooring.
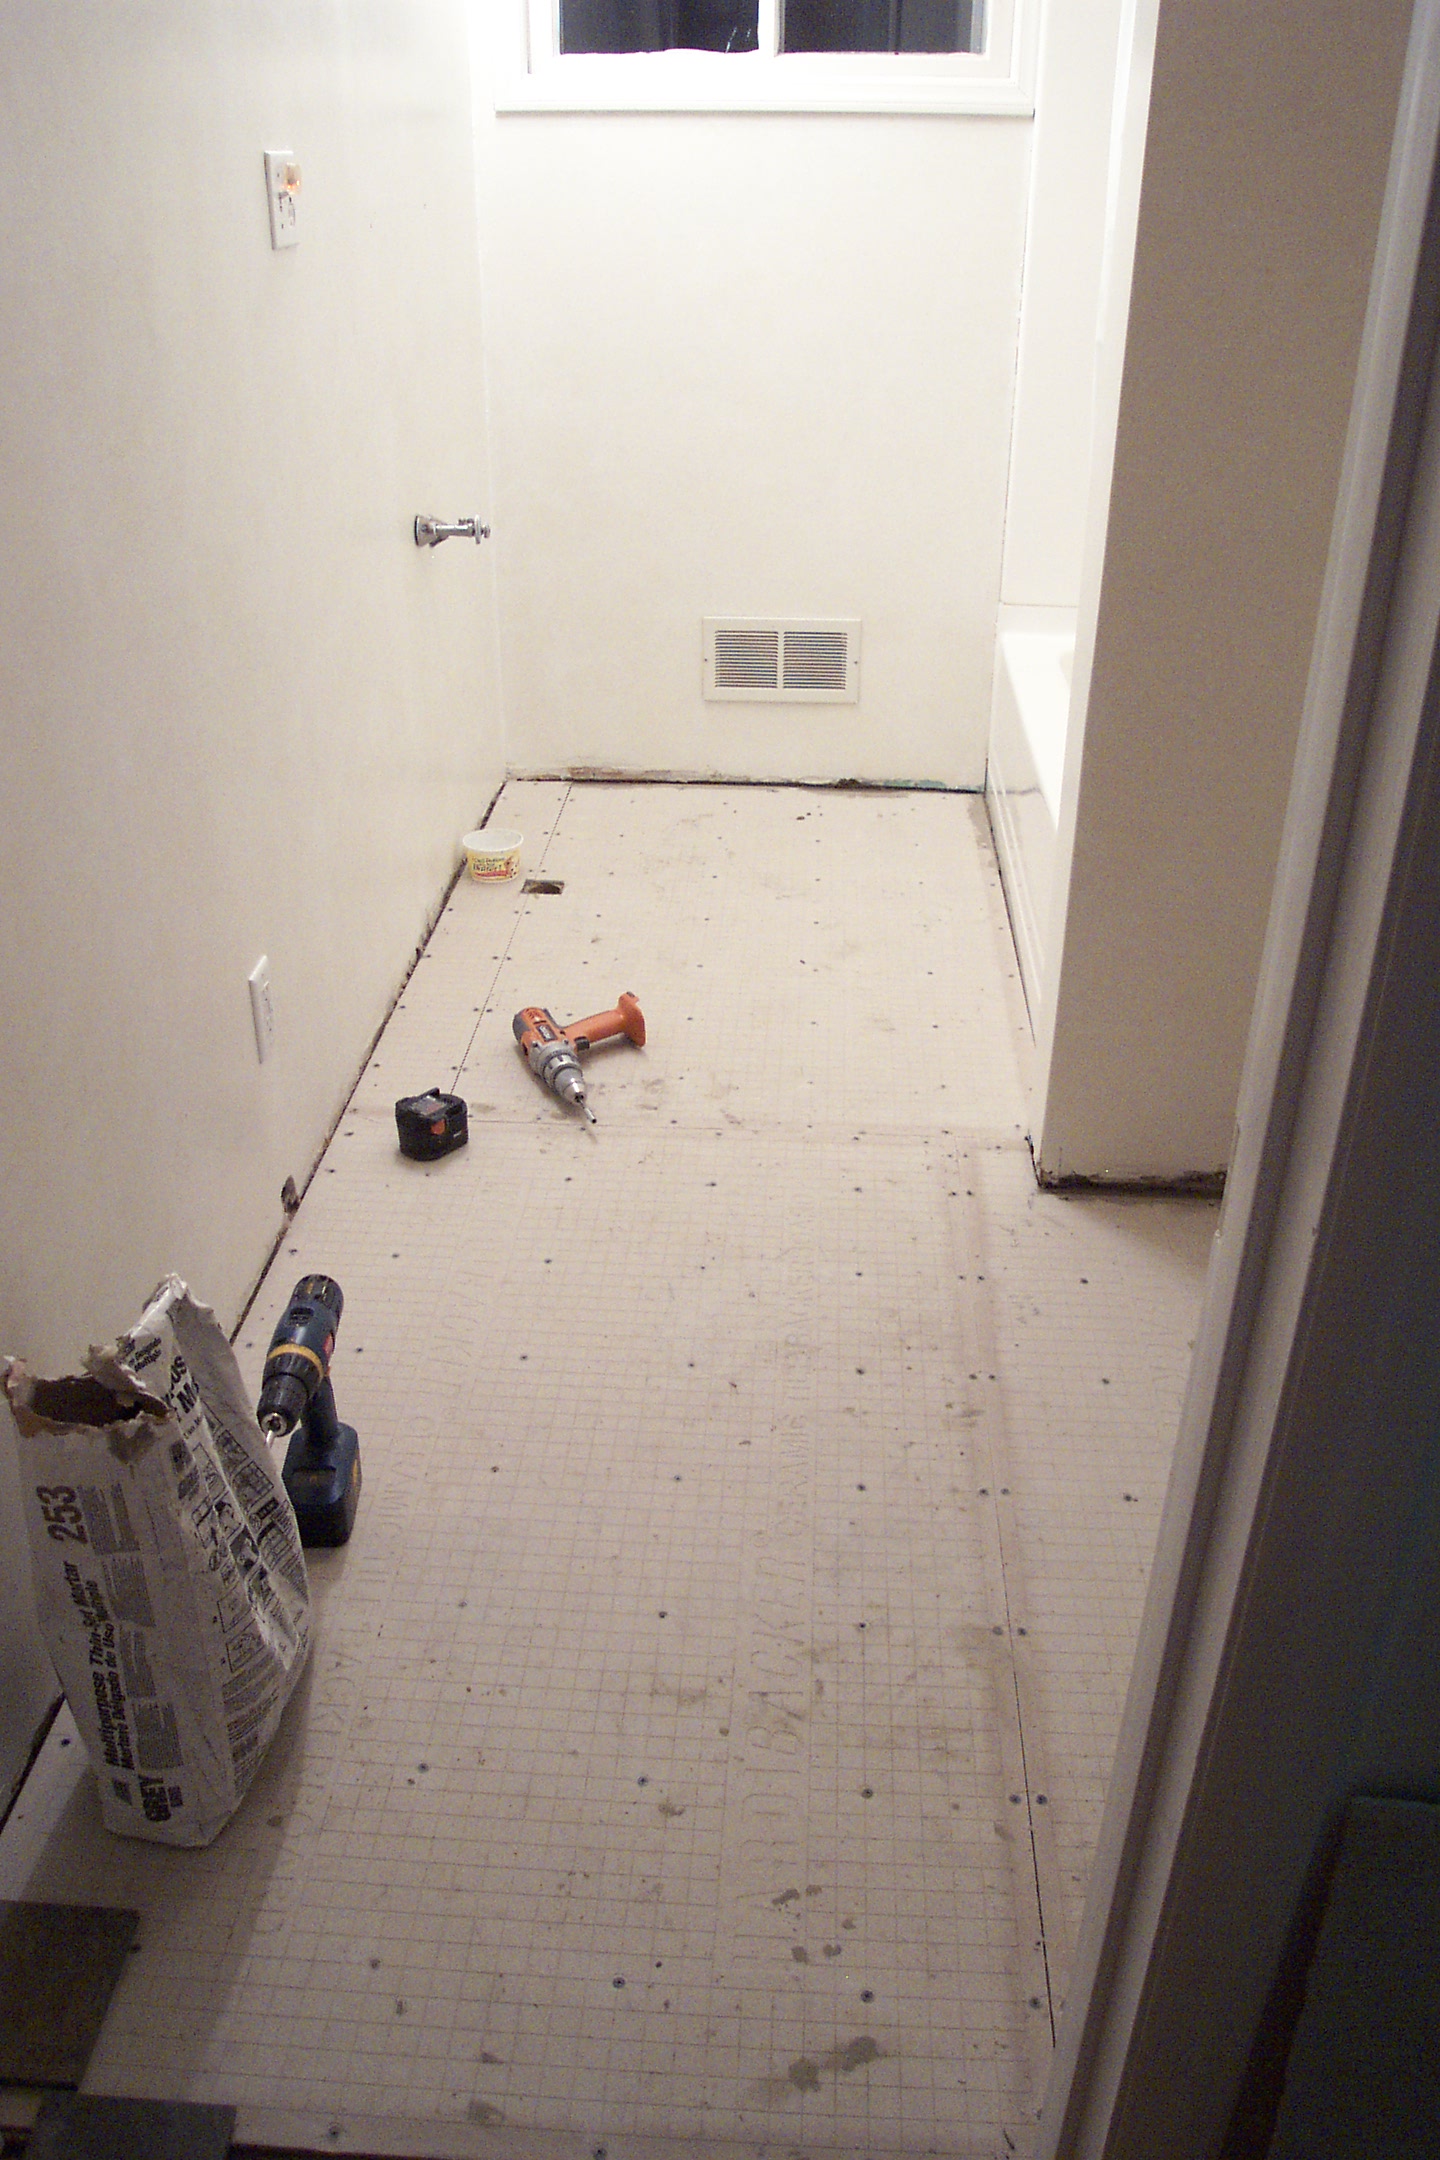
Step 2: Install the tile backerboard. This serves three functions:
- It levels out any bumpiness in the floor
- It makes the floor much more water-resistant. The backerboard is a concrete material that is unaffected by moisture.
- It gives the tile a good surface to bond to.
Step 3: Layout the electrical connection to the thermostat, temperature sensor placement and heating cable spacing on the floor. 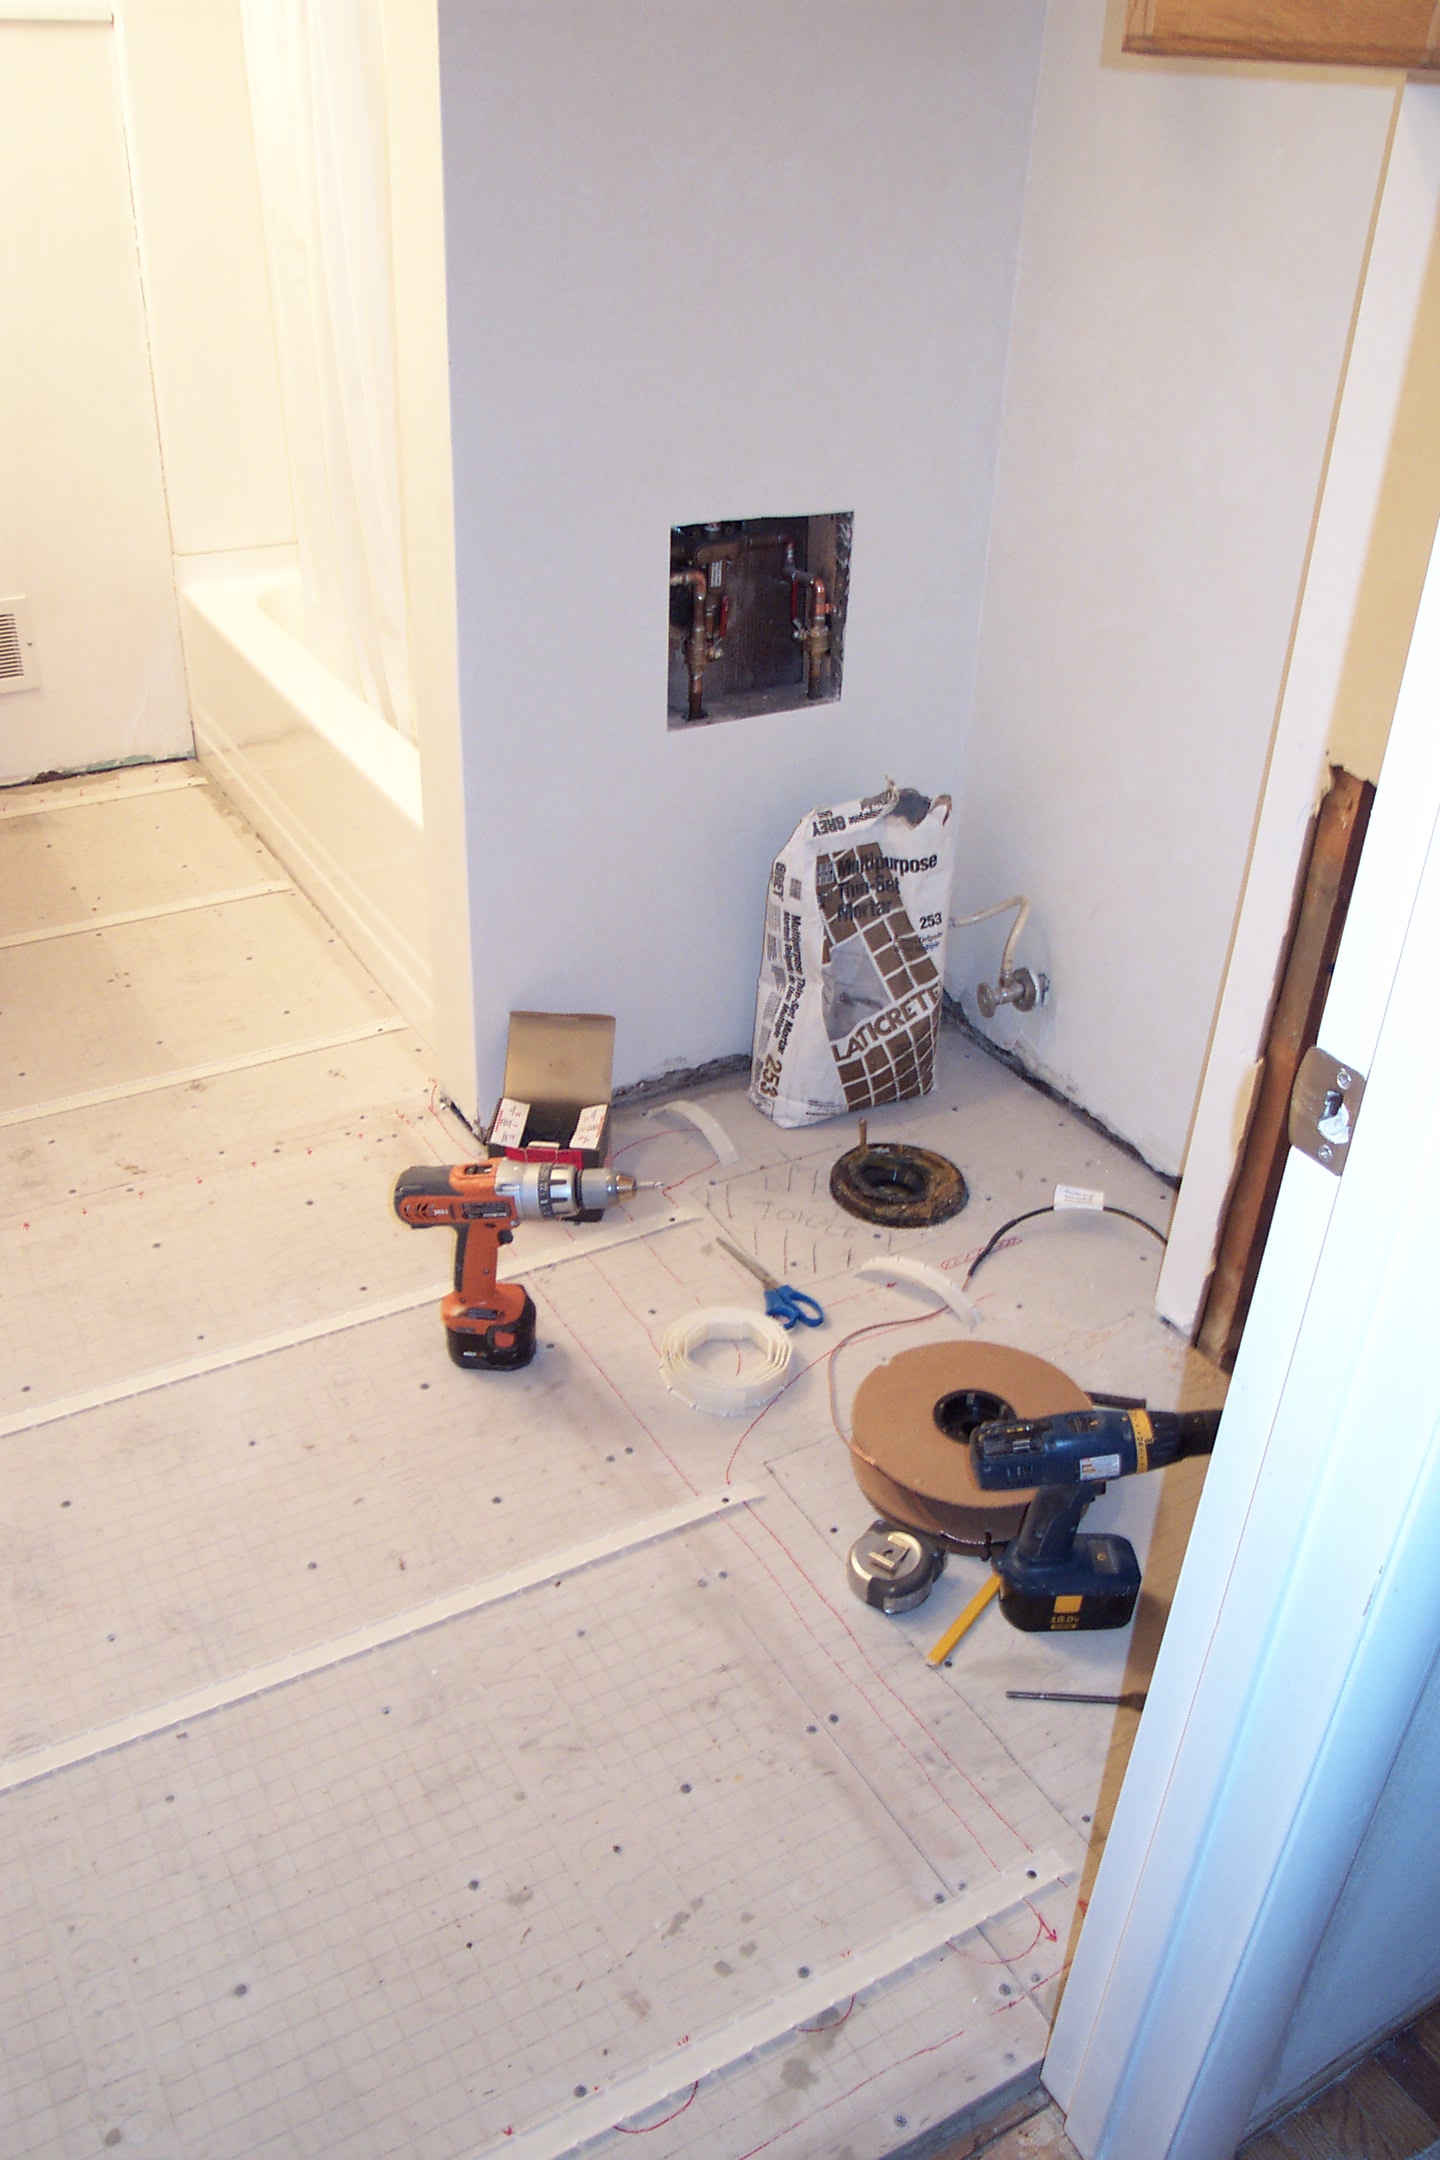
Step 4: Install the cable on the floor. This manufacturer provided some tracks with clips for fixing the wires in place. Don’t forget about going around the sides of the toilet a little bit. You don’t want your feet cold when you are using the toilet, do you? 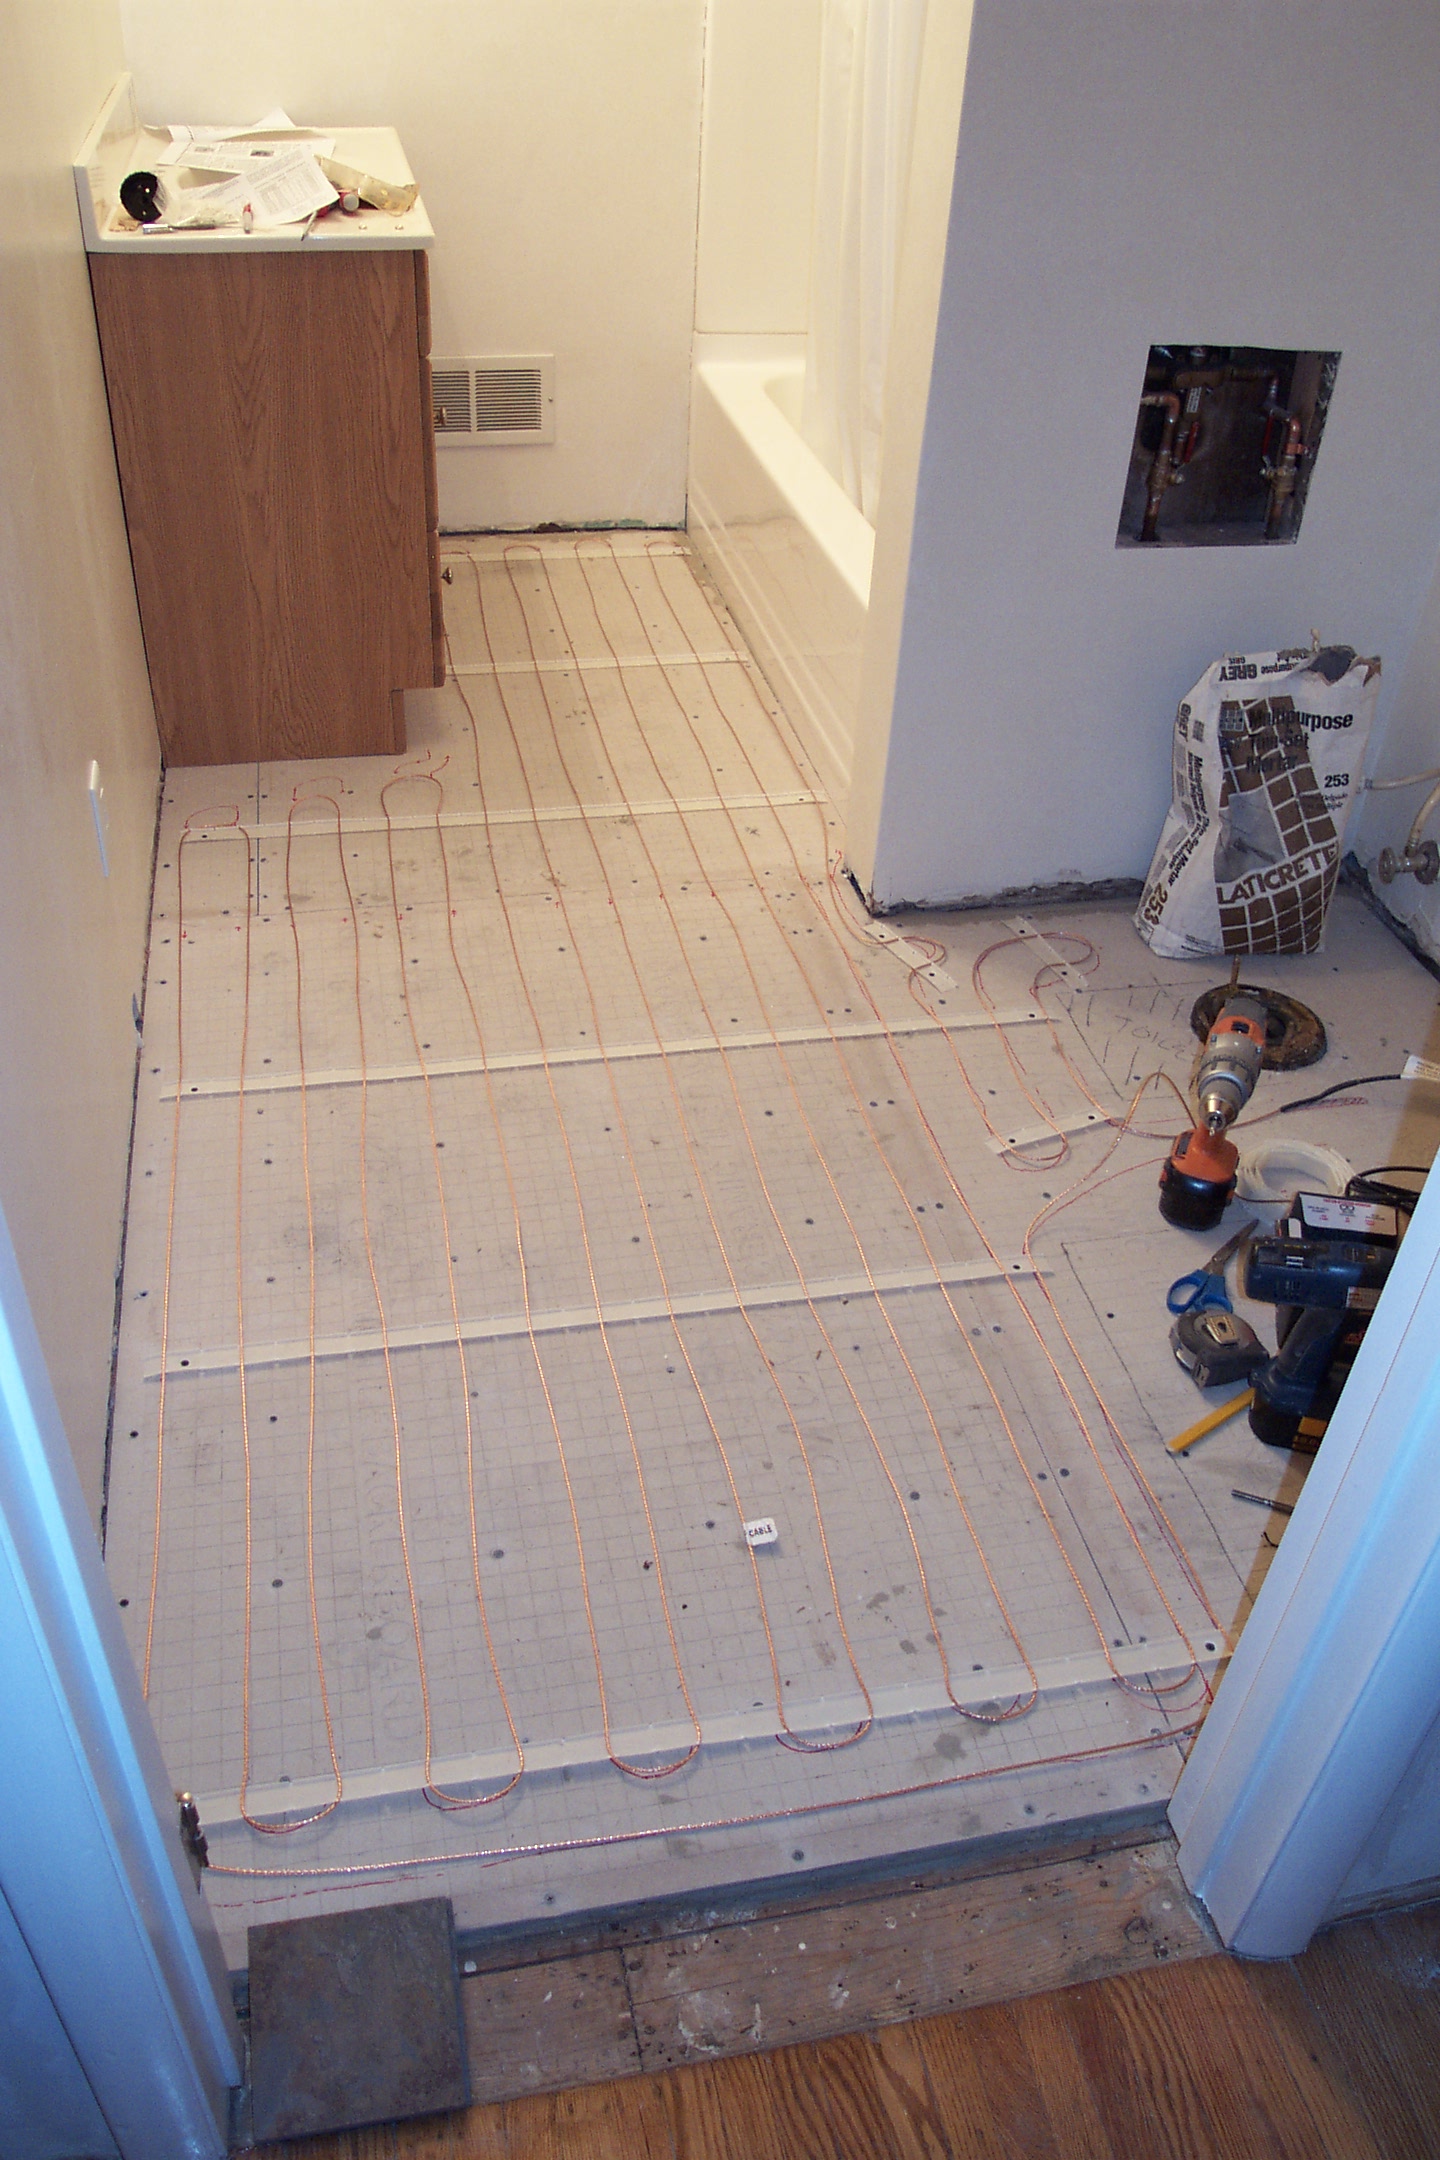
Step 5: Trowel on a scratch coat of mortar that barely covers the wiring. This was probably the trickiest part of the installation. The wires wiggled around a lot and made it difficult to get a smooth even surface. It turned out pretty good, but it took quite a while. I’ll make sure that I fix the heating cable down very liberally for the next installation. 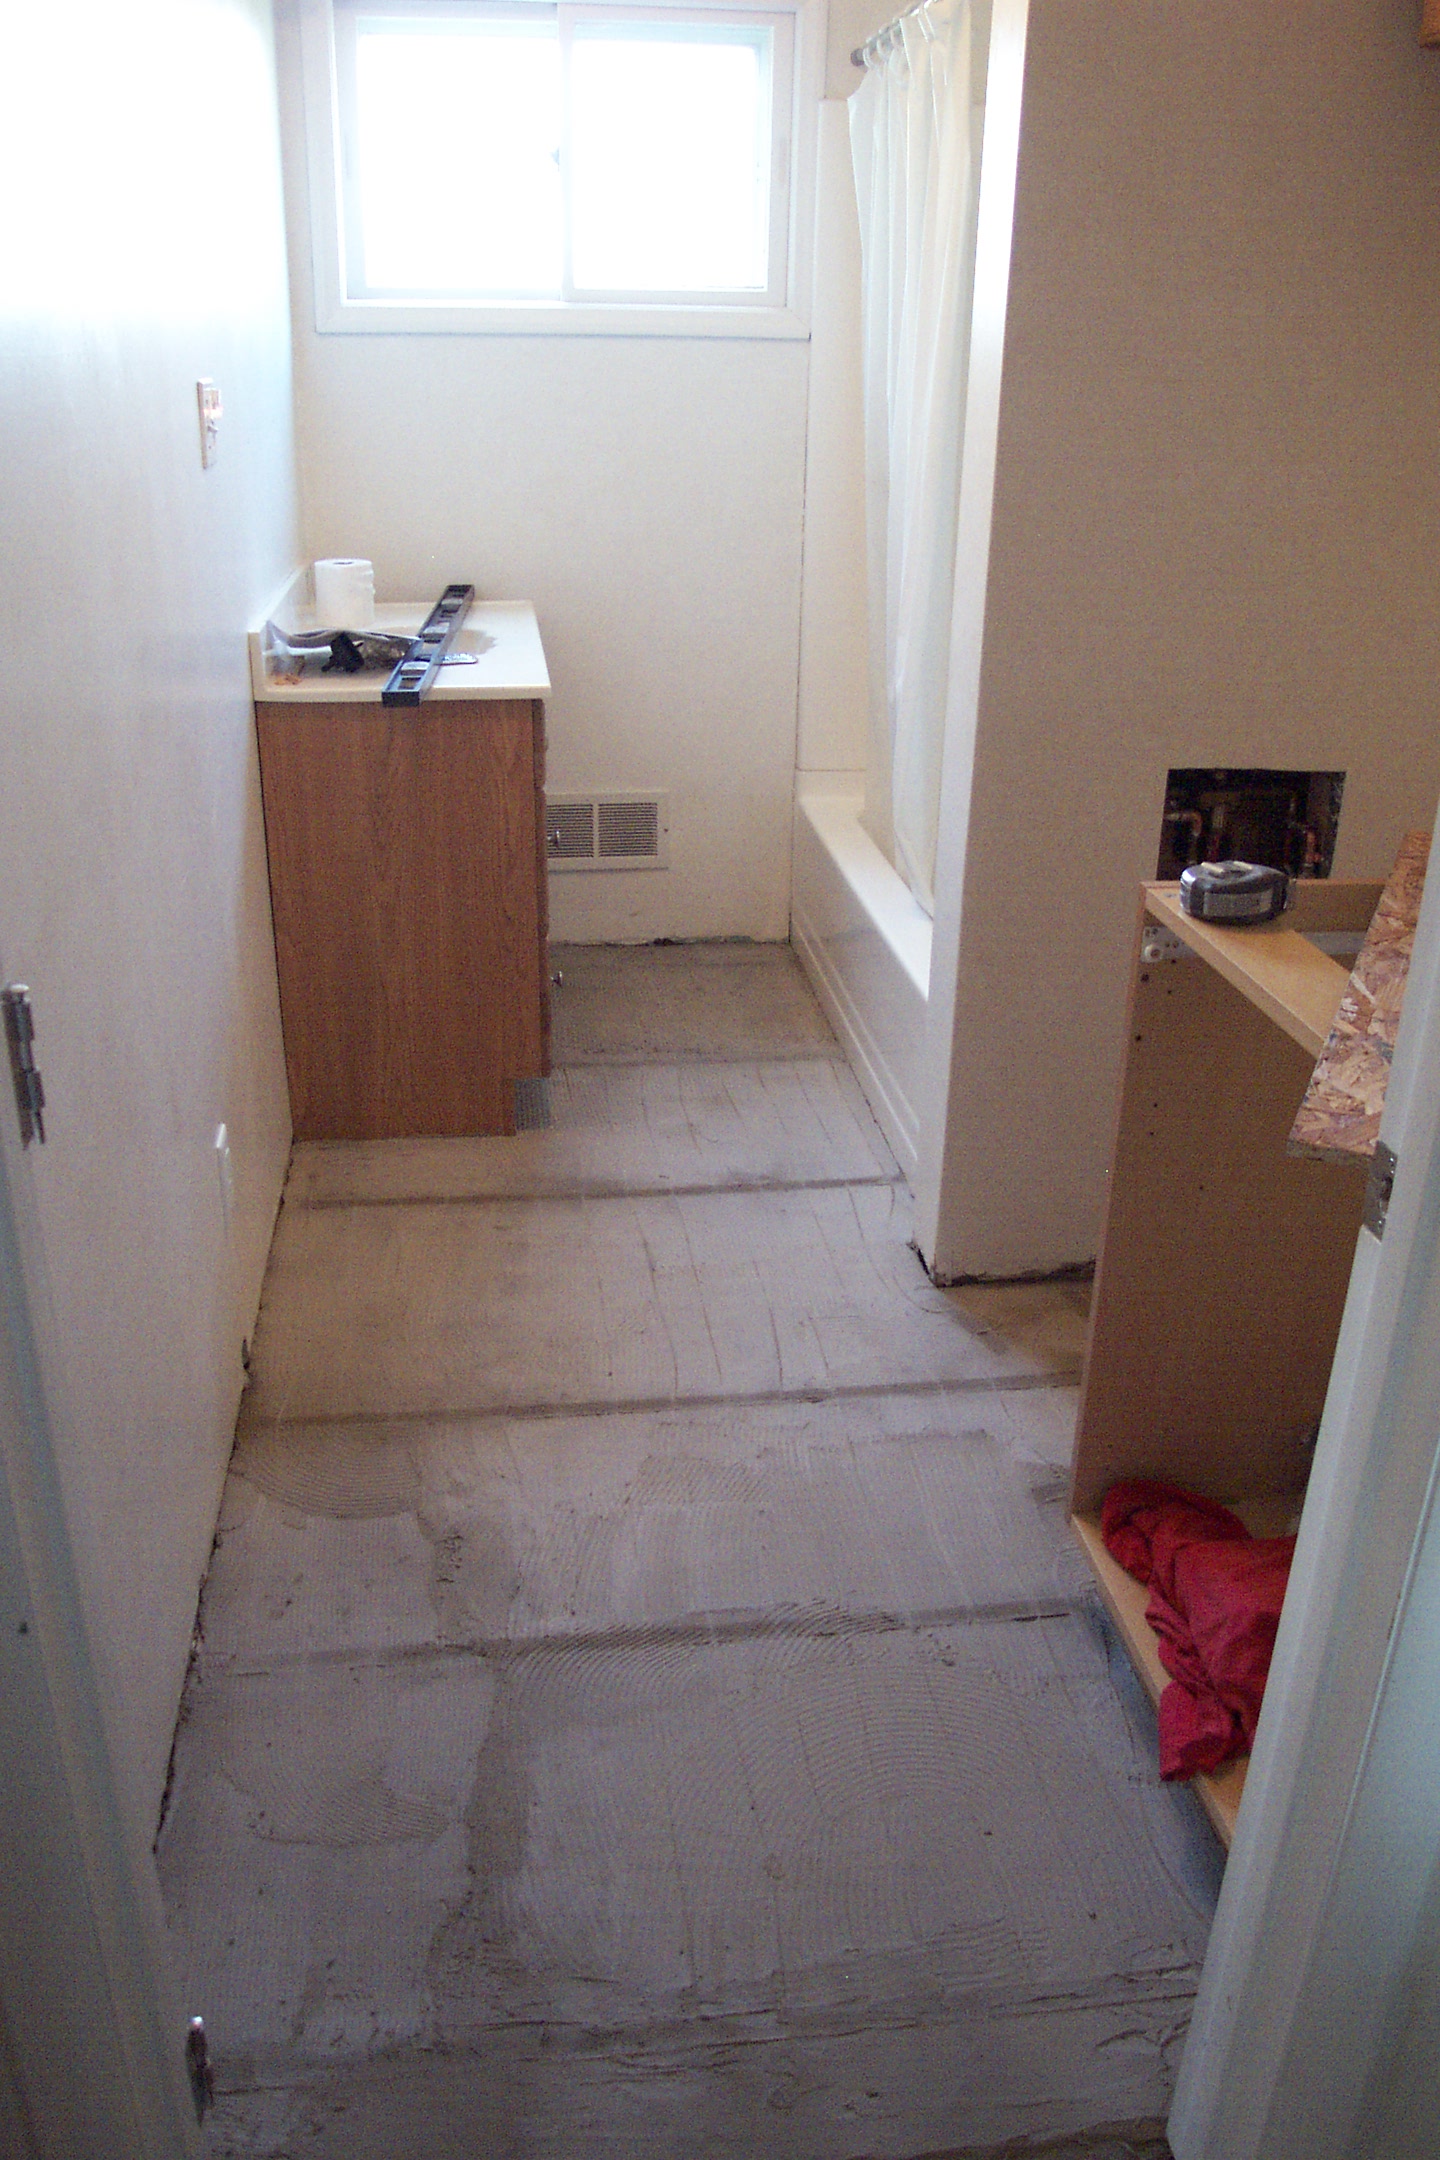
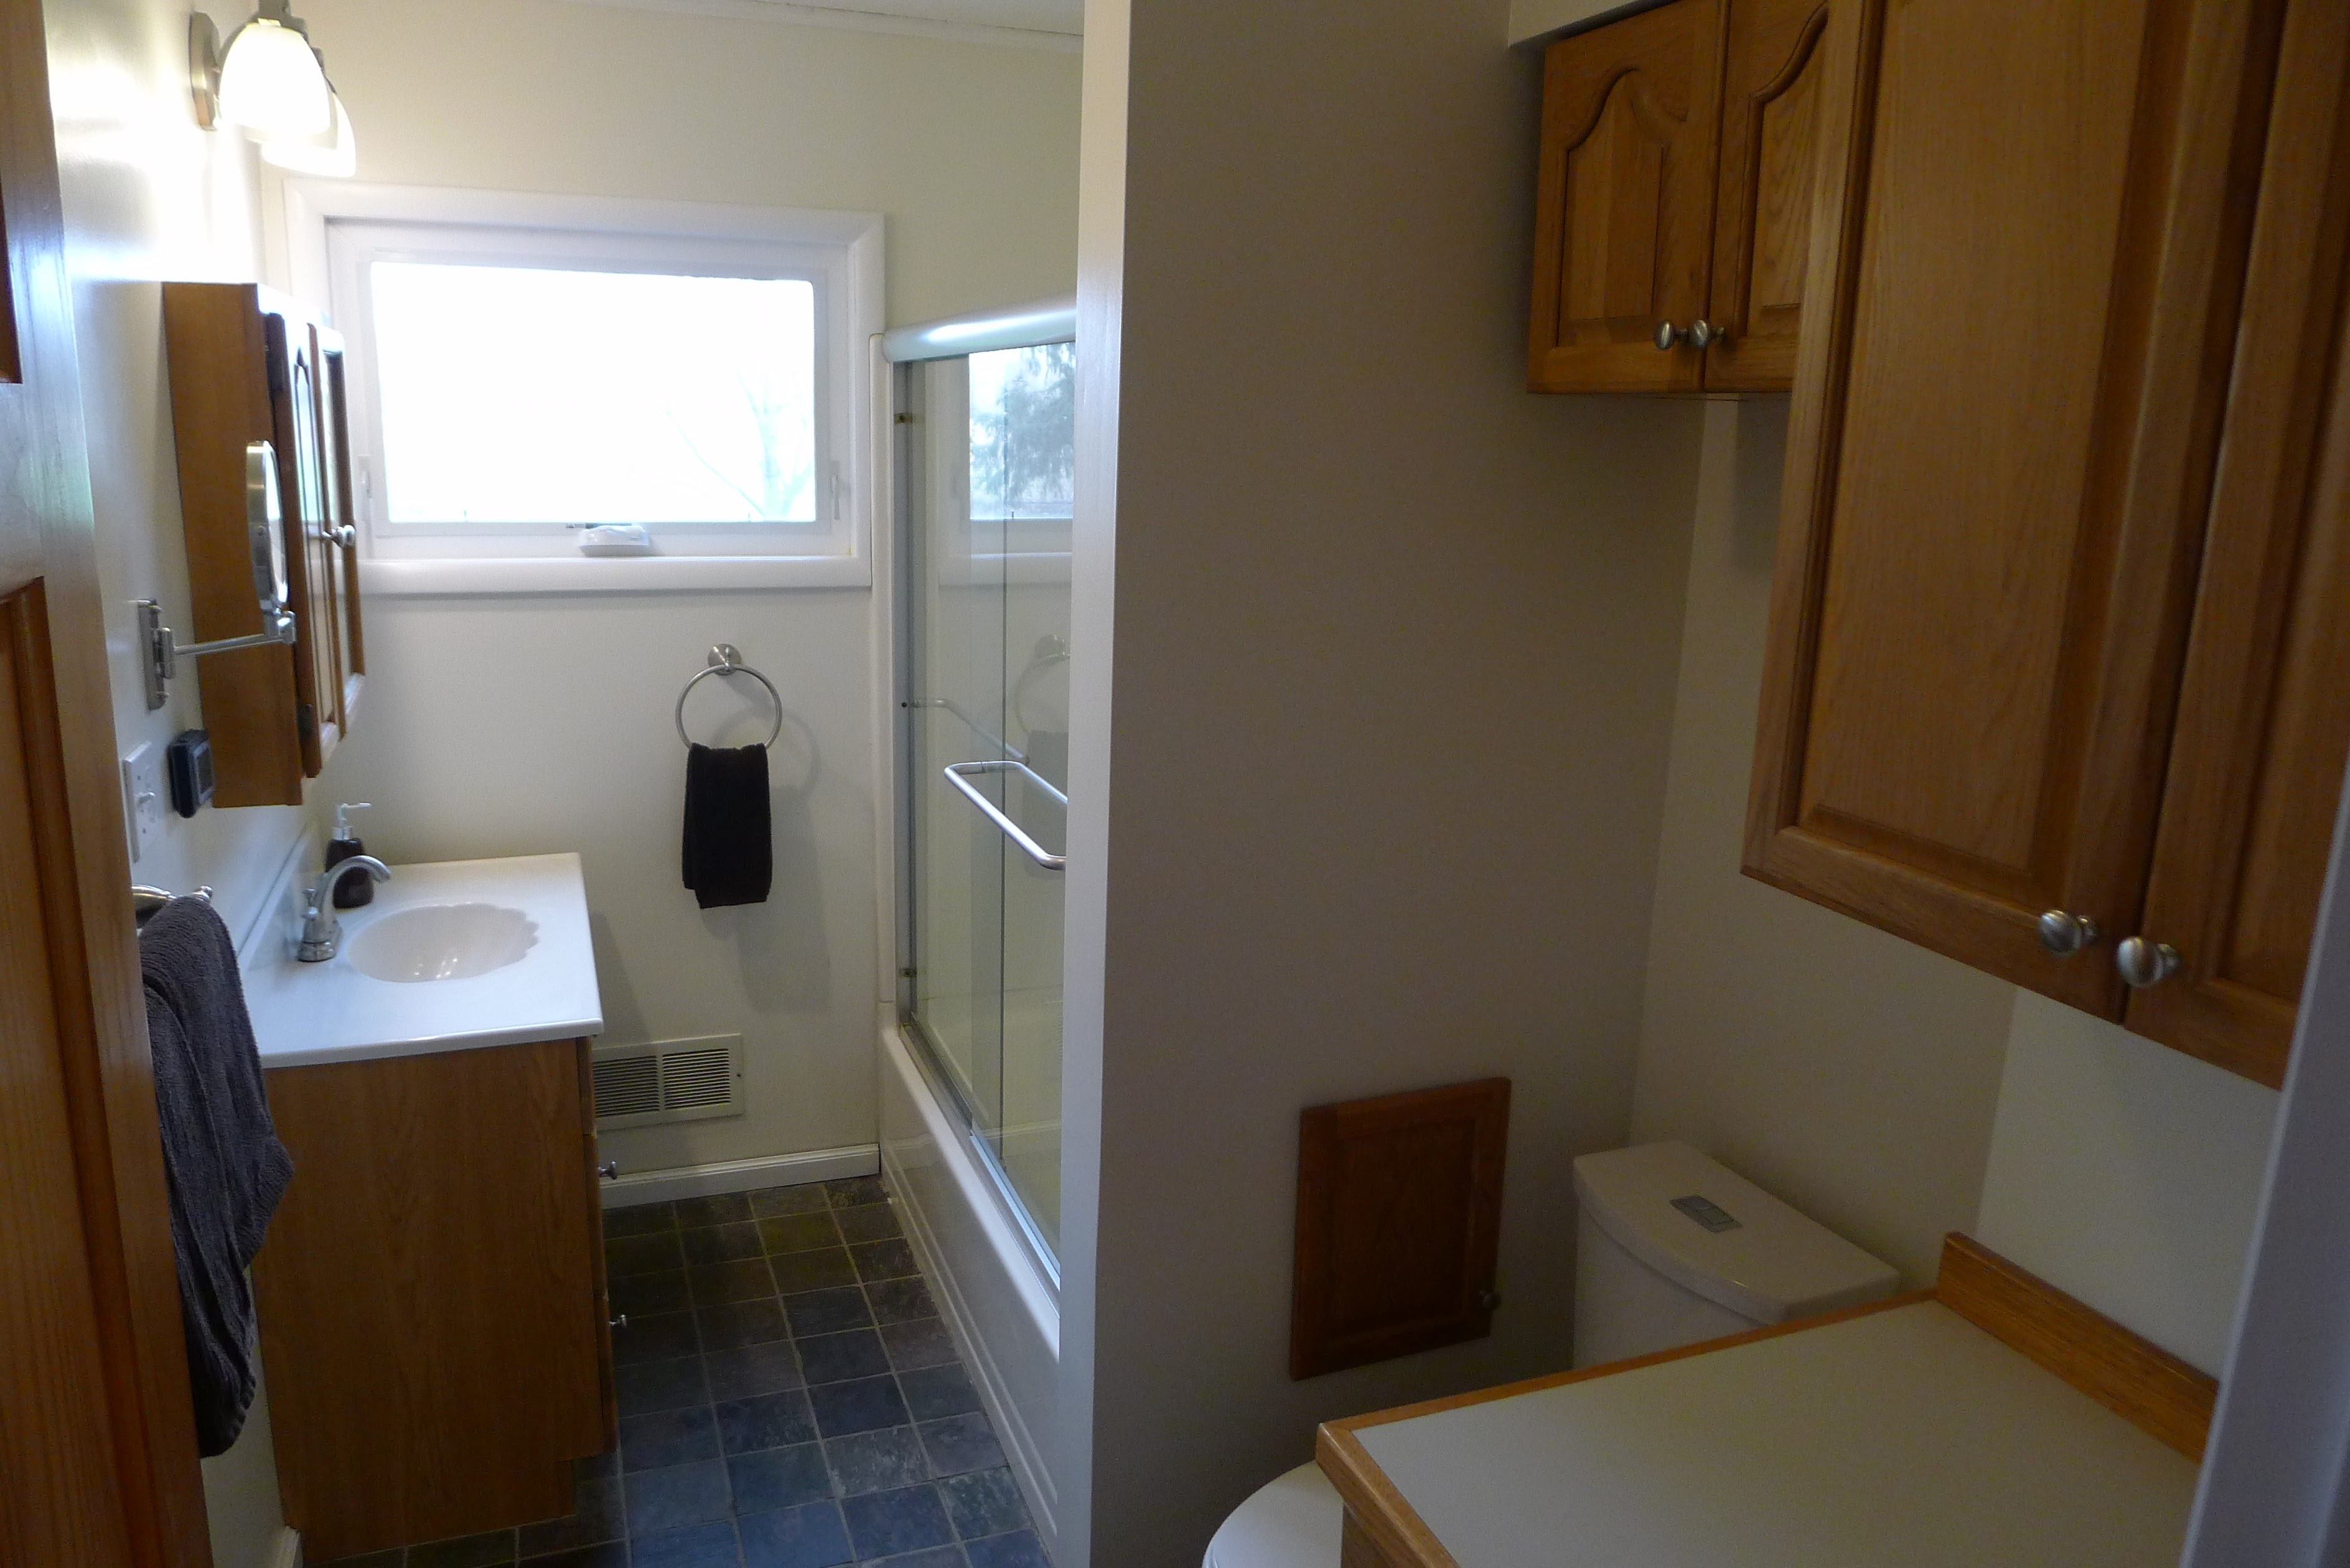
Step 6: Install the tile. I used slate here. I like the look, but the uneven thickness of the individual tiles made it a bit challenging. I had to keep checking for high and low spots with a 4 ft level as I went and make some adjustments to even things out. Or maybe my Dad was helping with that part… this was definitely another father/son effort. 
Step 7: Grout. Make sure that you wash everything off well as the grout starts to haze over or it is a real pain to get that stuff off! I sealed the grout with a few coats of grout sealer too. 
Step 8: Enjoy a nice warm tile floor. 🙂
What I’m doing different this time
The biggest thing that I’m doing different this time, is sourcing my own parts. There is nothing super sophisticated about electric floor heating, but somehow a number of specialty manufacturers have managed to make it seem like magic. Their web sites have so many options and consumer friendly packages that they are able to charge 4 or 5 times what the actual materials cost. I was sucked into that trap the first time, and I bought all of my floor heating materials from an on-line supplier (EASYHEAT Warm Tiles). It cost me about $300 for the materials for that tiny bathroom. This time around, I know what I need, so I went shopping on Amazon for the parts and pieces to assemble my own floor heating kit:
| Description | Qty | $ Subtotal | Link |
| Heating Cable | 50 sq. ft. | $32.90 | Amazon |
| Floor Temperature Sensors | 2 | $19.50 | Amazon |
| Thermostat (w/ WiFi) | 1 | $69.99 | Amazon |
| GFCI | 1 | $11.99 | Amazon |
| 3M Foil Tape | 50 yd | $9.21 | Amazon |
| Total Cost: | $143.59 |
That is less than half the cost for a bathroom that is more than twice as big! I’m probably not doing much else different. That first attempt at floor heating worked really well and held up for more than 10 years after it was installed, so I don’t see much reason to change anything. Oh… I have learned a lot about tiling since that first attempt and I’m going to be using a tile leveling system this time around, but that is a topic for another post!
Till next time…
Looks good. Like the tile color. We have tile through out the home.